I’m attacking my fabric stash….and making apron skirts! I have so many novelty prints that look fun mismatched:
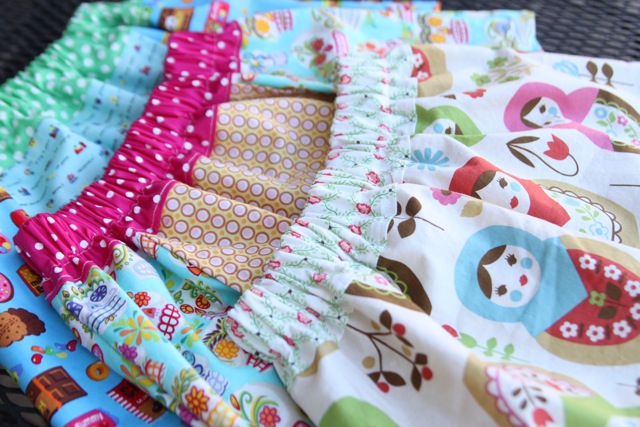
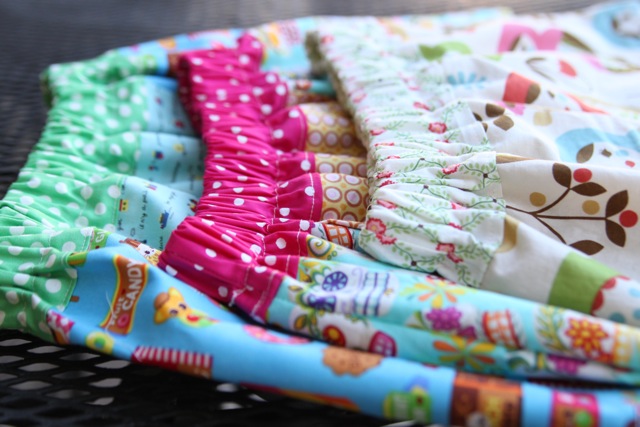
Here are just a few combinations I’ve made recently:
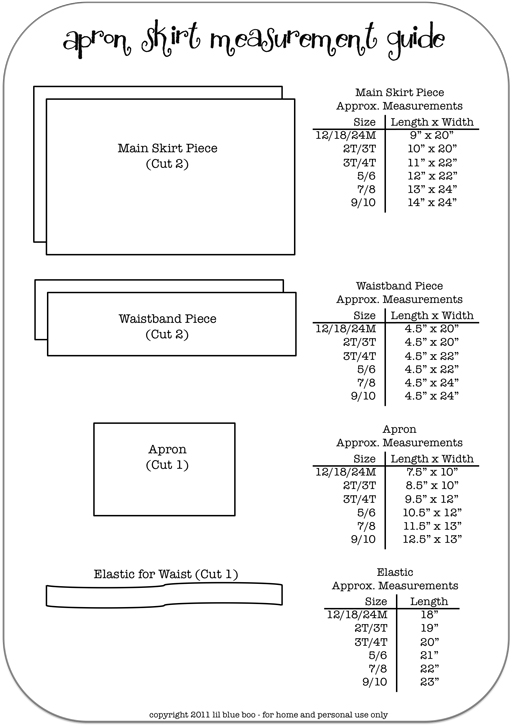
Here are the basic measurements I use for skirts (click image to download a PDF version):
To make your skirt the directions are pretty straight forward:
Step 1: Cut 2 main skirt pieces and 2 waistband pieces using the measurements in the chart.
Step 2: Cut one apron piece using the measurements in the chart.
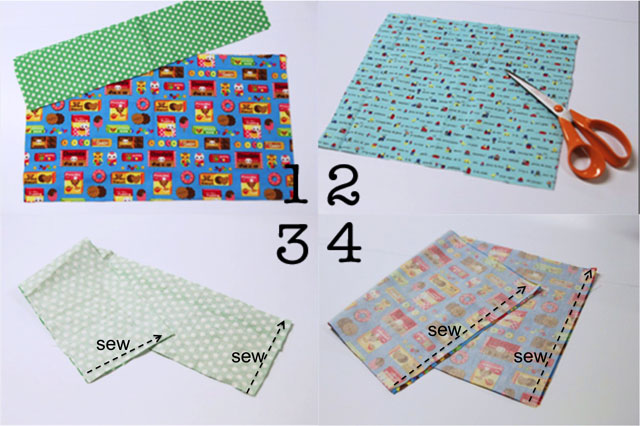
Step 3: Place your two waistband pieces together so that the right sides are facing each other and sew up the sides as shown using a 1/4″ seam. Finish your edges with a zig zag stitch or an overlock machine.
Step 4: Place your two main skirt pieces together so that the right sides are facing each other and sew up the sides as shown using a 1/4″ seam. Finish your edges with a zig zag stitch or an overlock machine.
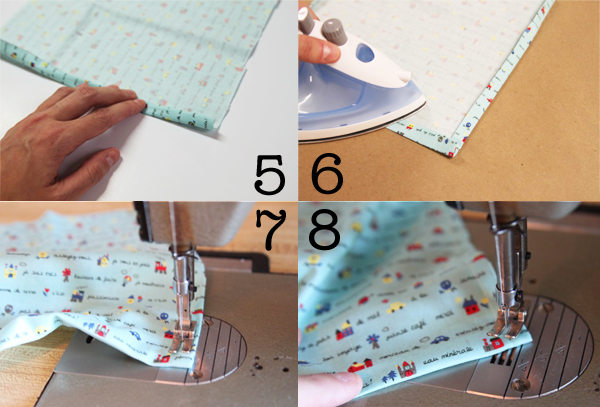
Step 5 & 6: Take your apron piece and fold one side 1/4″ and then again 1/2″. Press with an iron. Repeat for the opposite side and bottom of apron piece.
Step 7 & 8: Stitch the sides and bottom of the apron with a 3/8″ seam.
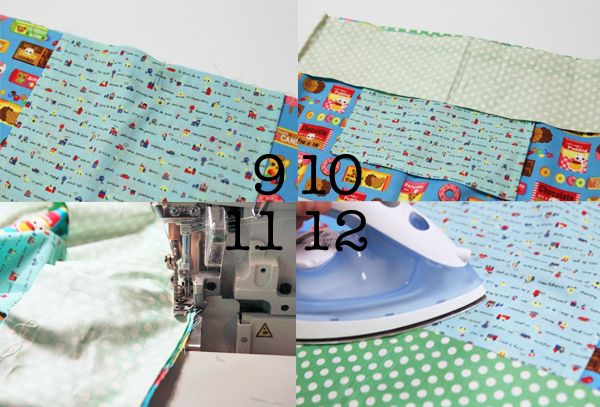
Step 9: Turn your main skirt piece right side out and place the apron piece on top so that it is centered in the middle.
Step 10: Place the main skirt piece up inside the waistband piece so that the right sides are together (your waistband piece will actually be upside down).
Step 11: Stitch all the way around the top of the waistband piece attaching all three pieces (main skirt piece, apron and waistband piece. Finish your edges with a zig zag stitch or an overlock machine.
Step 12: Flip the waistband piece back up and iron the seam flat (so that the inside of the seam is pointed upward onto the waistband).
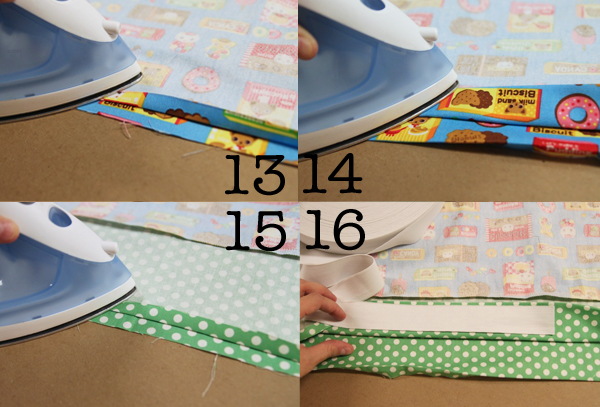
Step 13 & 14: Fold the hem of your skirt up a 1/2″ and press with an iron. Fold the hem over 1″ and press with an iron.
Step 15: Fold your waistband down 1/2″ and press with an iron.
Step 16: Fold your waistband down enough to accommodate the elastic width (allow about and 1/4″ on each side). Press with an iron.
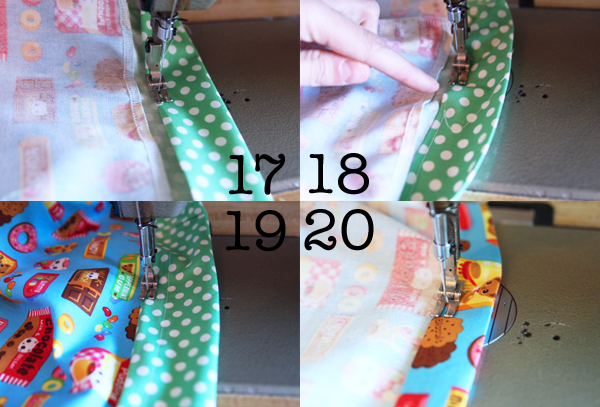
Step 17 & 18: Stitch the bottom fold of the waistband with a 1/8″ seam all the way around but leaving an inch opening to insert your elastic through.
Step 19: Top stitch the seam connecting the waistband and the main skirt piece.
Step 20: Stitch all the way around the hem of the skirt using a 1/8″ seam.
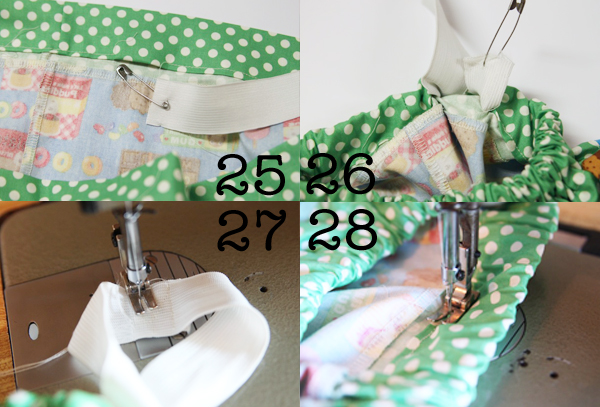
Step 25 & 26: Using a safety pin, insert the elastic up into the 1″ gap in the waistband and work it all the way around until it comes out the other side.
Step 27: Stitch the elastic closed.
Step 28: Stitch the 1″ gap closed.
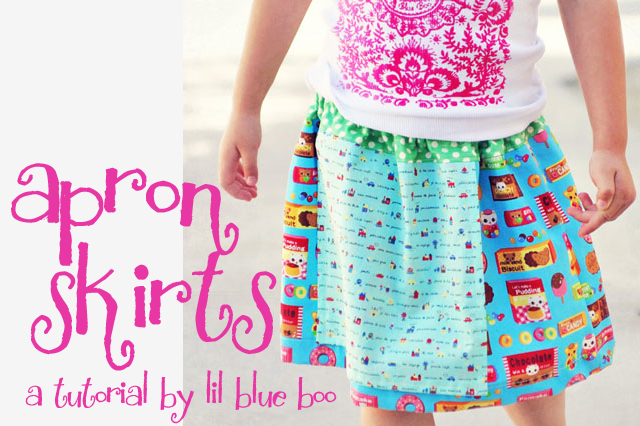
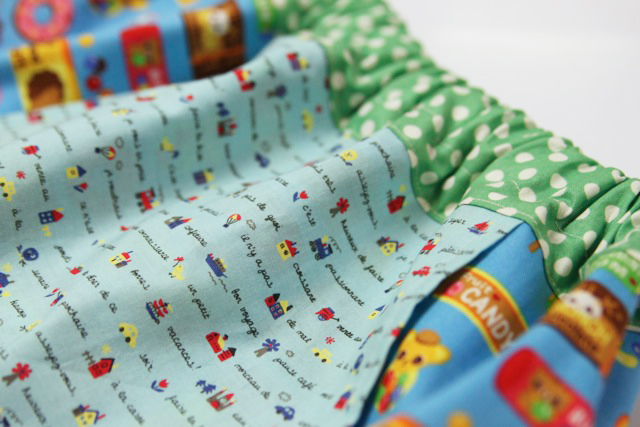
A finished apron skirt! You can also leave the apron off for an easy basic skirt.
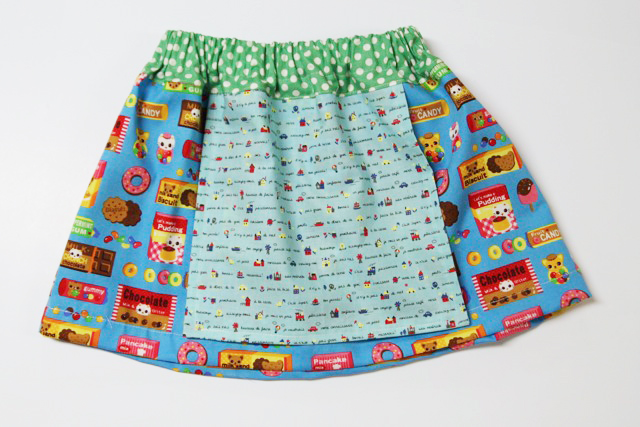
I love the contrast of these fun Japanese fabrics:

i get soooo excited everytime you post a tutorial!!! You are awesome!!! 🙂
Another idea: make that front apron panel a big pocket! My 6 year old “collector” could stash all her shells and rocks there.
Donuts! I love your tutorials as well. They really make your site invaluable as well as entertaining. 🙂
Thank you for the tutorial- I love all those gorgeous fabrics you have used. I am always trying to get my stash of fabric down! Thanks again.
Thanks for another great tutorial! I enjoy your blog immensely!
Yay! I love apron dresses and skirts and having some pre-measured tutorials only helps my obsession. Thanks Ashley!~
adorable!! I can’t wait to get home and make one of these! thank you for posting!! I am soo excited!
To cute. I will so have to make one of these for my daughter. She will love it…
Jeanna @ dramaqueenseams.blgospot.com
This was the BEST tutorial on this kind of skirt I have seen! SO easy to follow with all the pics! THanks so much. I am new at sewing and you made me feel like I can do this!!
Jess
Ashley, you are THE BEST!!! <3
Awww, thanks for sharing the tutorial. I just made one this afternoon and my little bug loves it. 🙂
The skirt is so cute, good idea. I think every little girl will love this skirt, and the little girl wear this skirt must very cute!! I look forward for your new idea!
Awesome idea! Can’t wait to get my sewing machine so I can make this. My 7 year old, loves to collect seashells from the beach, and this makes it less messy in my car! 😉 Yay!!!
Thank you so much for your pdf measurement guide!
I just finished one for my granddaughter – I added a ruffle to the bottom of the apron and a pleated pocked. It’s adorable.
Hello,
I love this tutorial! I am starting my very first apron skirt but I am so confused in the beginning. I am unclear of what sides to sew… Like when I am sewing the waistband pieces and the main skirt piece…do I sew up the SIDES or the edges? Do I do a zig zag stitch all the way down or just on the ends? Answers would be greatly appreciated. Thanks.
Sew up the sides of both the waistband and the main skirt piece. The zigzag the edges if you want to keep them from fraying.
I love this idea, I was just thinking how much my little girls would love to be allowed to wipe their hands on their clothes! which made me think, if you could make the apron part detatchable like with buttons or snaps, that would be so awesome, you could mix and match skirts and aprons and there would always be a clean/dry place to wipe your hands! Love your tutorials!
Another great tutorial! I just love this cute little skirt. I shared this today for Skirt Week at seven thirty three.
Hi,
I just wanted to thank you for posting such a great tutorial on your site.
I am pretty new to sewing and this made me feel like a pro. It was well written, well photographed and really easy to follow. Now I have two pretty skirts for two pretty girls.
Thanks
Kat
What size elastic doe we use? Thanks
I’m a complete beginner sewer. I have done only 2 projects so far. Today I decided to make this skirt. It took me 3 hours lol but I did it and it fits my 3 year old perfectly and I feel so proud of myself. Its projects like these that will definitely keep my love for sewing going. Thank you so much! :o)
Love this! Making one tonight and didn’t see what width elastic to use. I’m sure I’m overlooking it. Did u use 1″? Great tutorial! Thank u!!
I just had to thank you for this free tutorial/download. I made this for my granddaughter because she has some funky cute patterned tights we couldn’t find a good match for. Enter your pattern idea! It turned out so cute and was just what those tights needed. I want to make a few more now too!