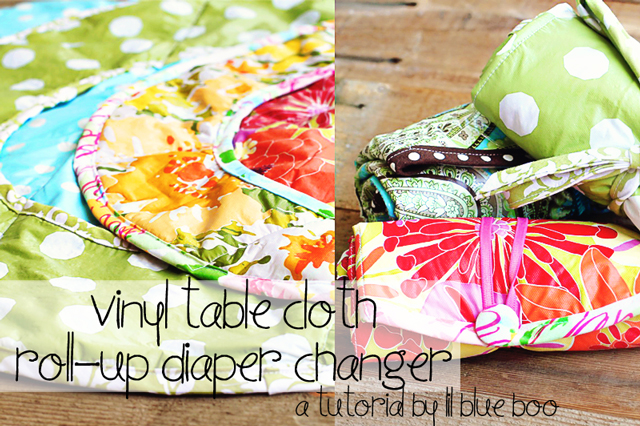
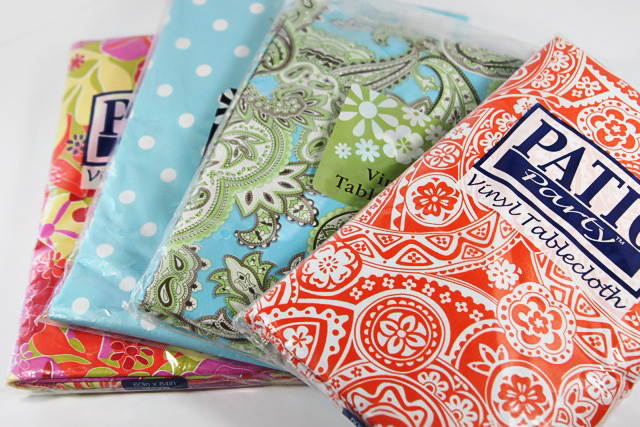
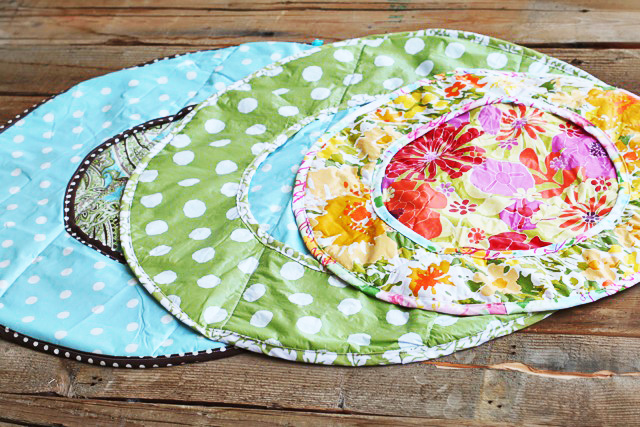
It’s a baby boom in the Lil Blue Boo family. I have two brand new nieces…..one is only a week old. And of course there’s the recent announcement Boo helped me make. I love round diaper changing pads and wanted to make a few for gifts. I’d been stocking up on these pretty vinyl tablecloths from Marshall’s and TJ Maxx because they were all under $5. I had a few projects in mind for them and this was one of them.
A diaper changer pad in action:
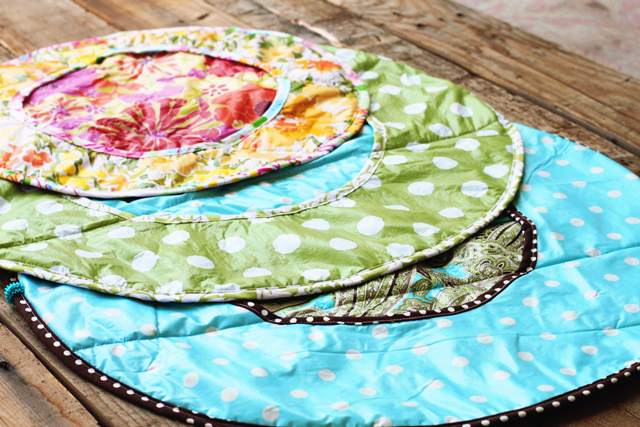
I love the variety of color and how easy they are to make. The most tedious part is making the bias tape……but you could always use store bought trim and you could whip one of these out in 30 minutes.
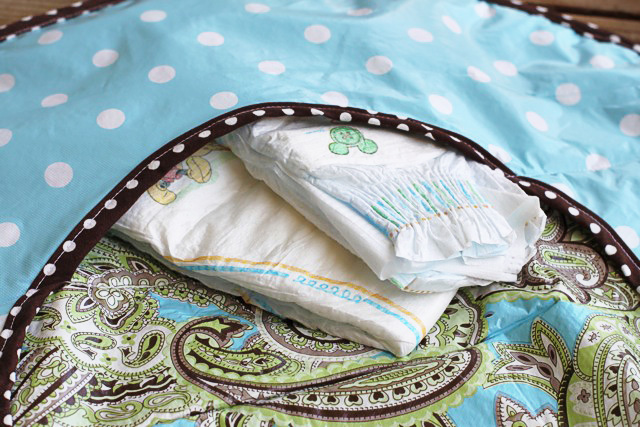
The pockets hold diapers, a change of clothes and a small pack of wipes:
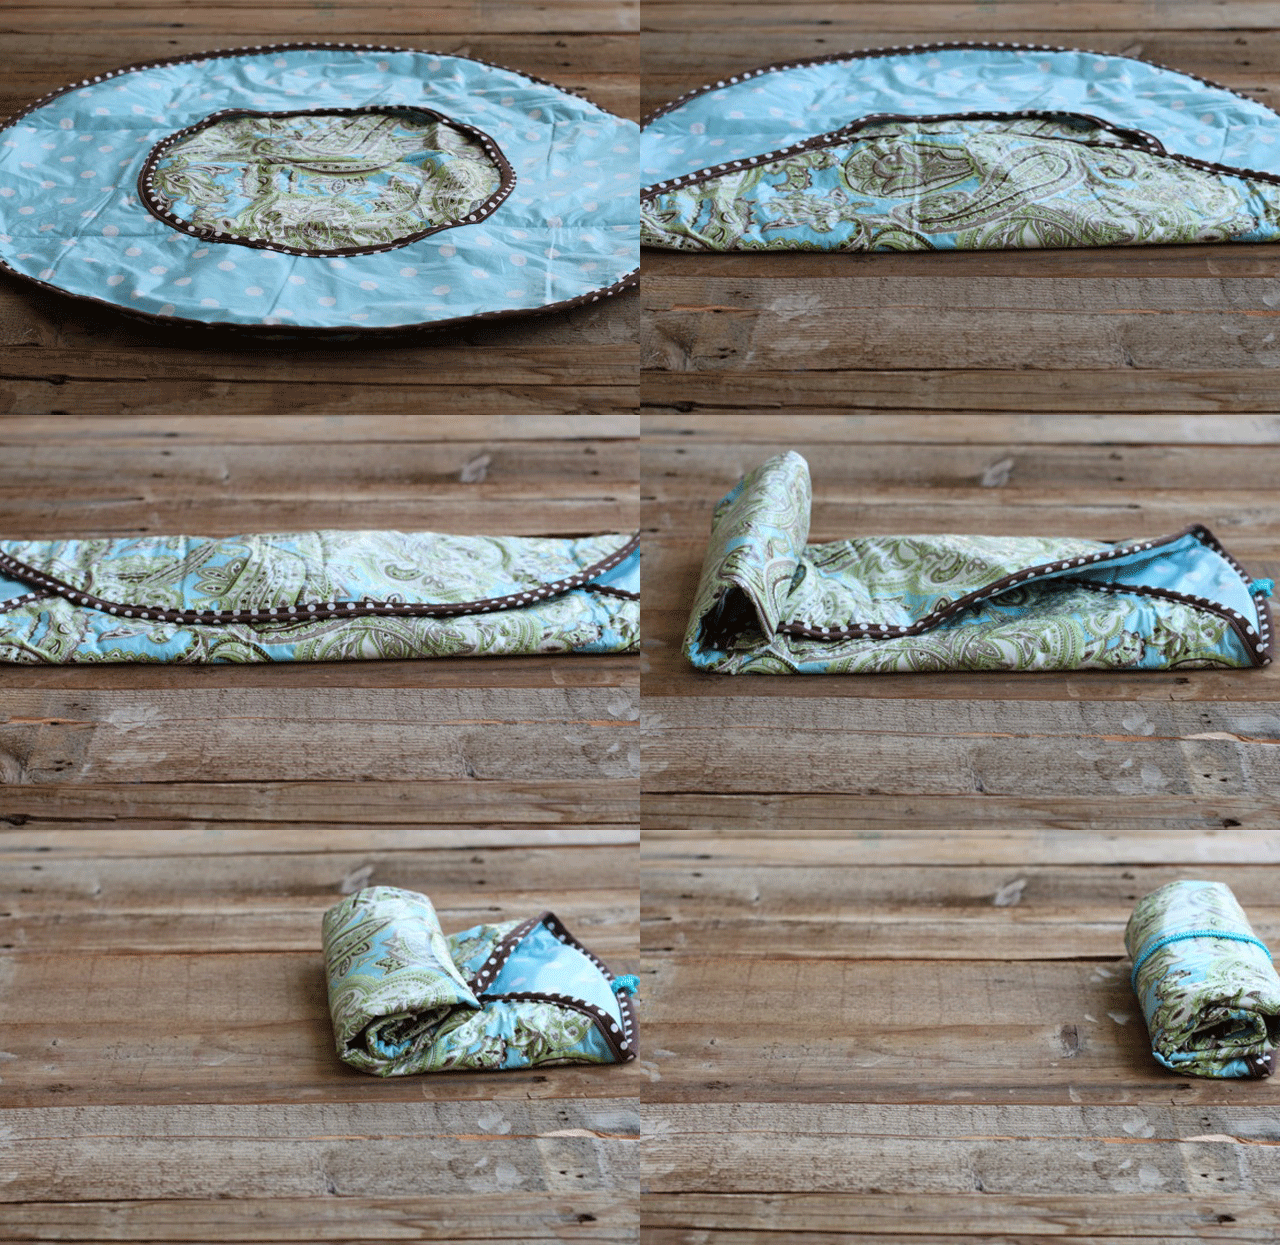
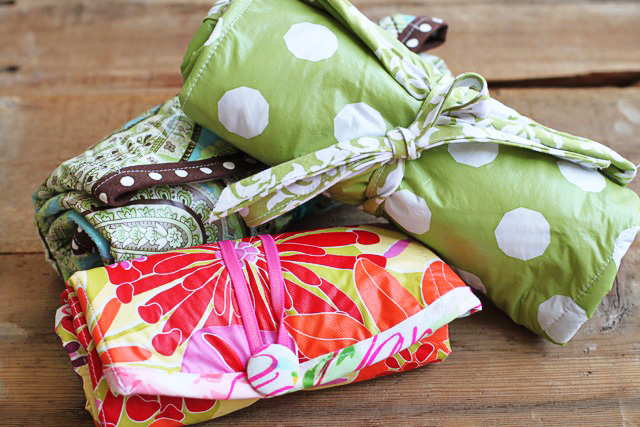
Everything rolls up nice and neat into a roll that can be thrown into a purse or bag:
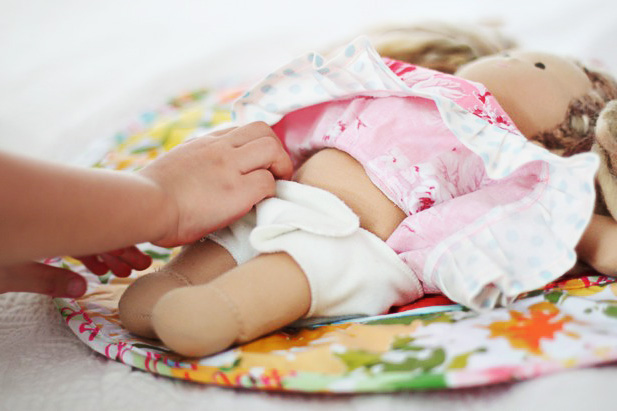
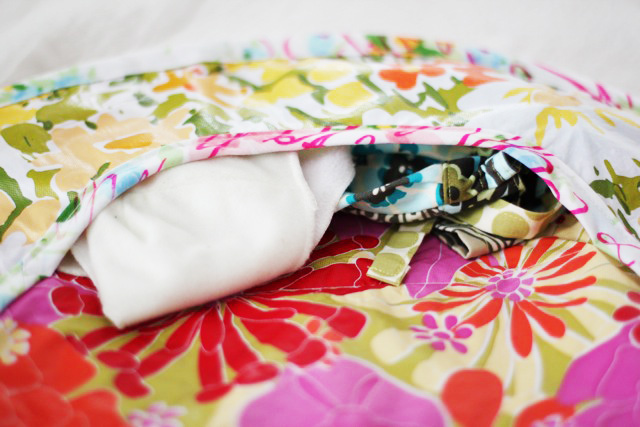
I made a miniature version for Boo’s Apple Tree House doll so that she can play “mommy” and practice some diaper changing:
Doll diapers and a doll dress (by our favorite doll clothier Melamoose):
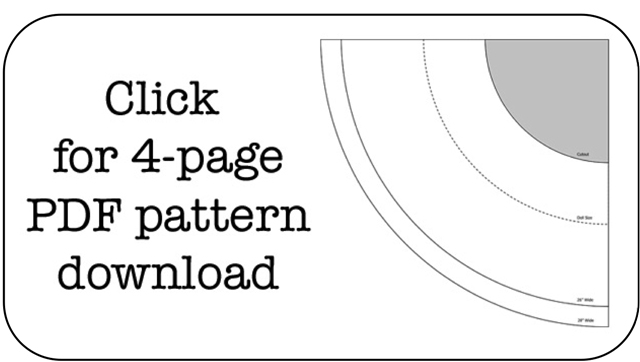
I created this template for 2 different sizes of the diaper changer and a doll size that should save you some time:
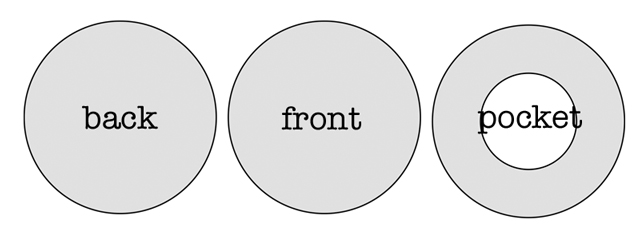
Use the template download to create a full circular pattern onto brown paper or newspaper (the template is one quarter of the circle). Cut out three circle pieces from your vinyl tablecloth: front, back and pocket pieces. The pocket piece has the cutout in the center.
Once your pieces are cut out, you’ll start with the pocket piece:
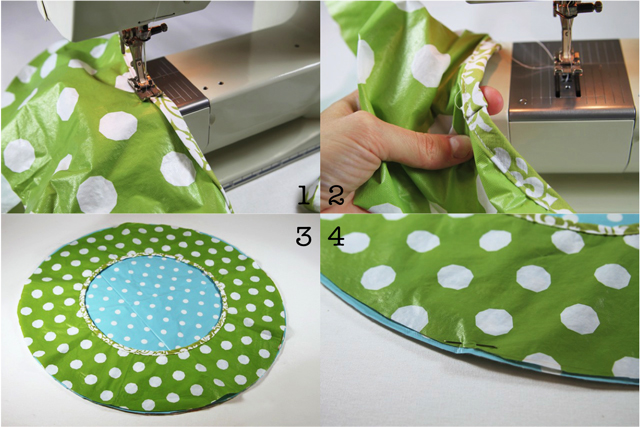
Step 1: Start by sewing bias trim around the cutout circle on the pocket piece.
Step 2: As you sew all the way around and reach where you started the trim, carefully fold the raw ends under to finish.
Step 3: Layer your back piece and front piece on top of each other with the flannel/wrong sides together and lay the pocket piece on top.
Step 4: Pin all three layers together to secure them in place.
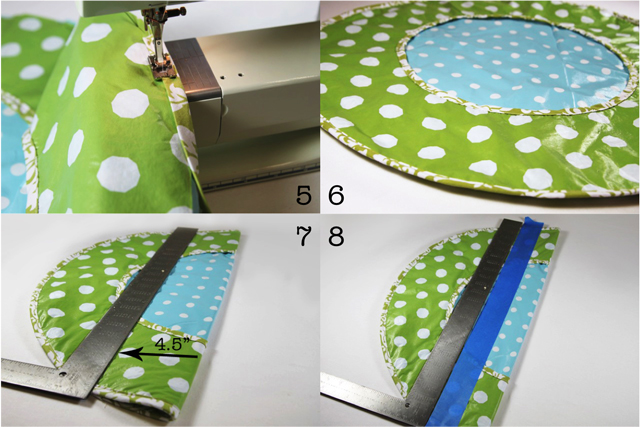
Step 5: Carefully sew bias trim around the outside of the changer making sure to sew through all three layers.
Step 6: The diaper changer with all the trim added.
Step 7: Fold the changer in half and measure 4.5″ from the center fold.
Step 8: Mark the 4.5″ all the way across the changer using masking or painter’s tape. Repeat for the opposite side.
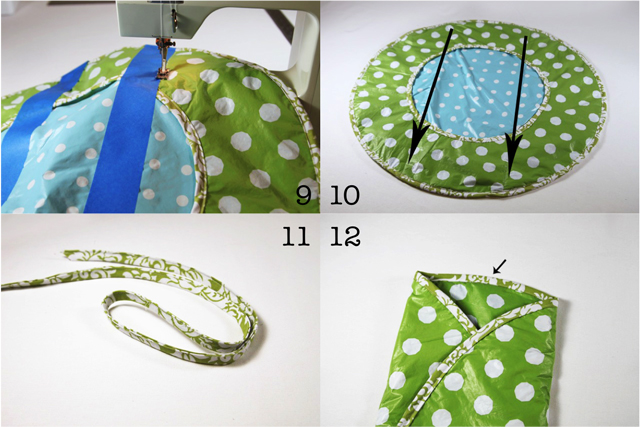
Step 9: Sew all the way across the changer using the tape as your guides.
Step 10: Your changer should now have two stitched lines as shown by the arrows. These lines will assist in folding the changer and creates the actual pockets.
Step 11: Stitch about a 20″ length of bias tape closed that will be as a tie to close the changer when rolled up.
Step 12: Fold in both sides of the changer and mark the center as shown in the photo. Remove a few stitches at this point using a seam ripper.
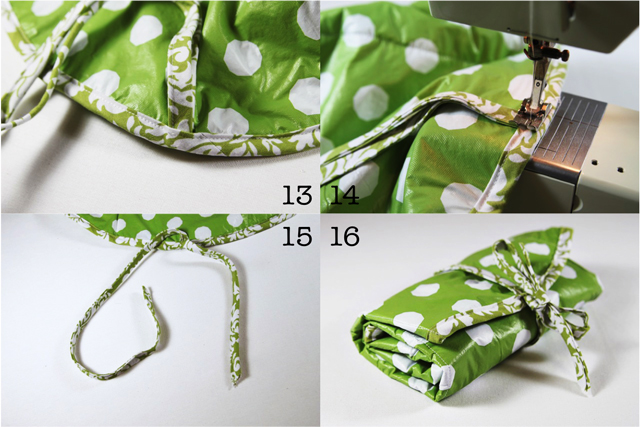
Step 13: Fold your tie in half, with one side about 6″ longer than the other and insert down into the trim where the stitches were removed.
Step 14: Sew the trim closed to secure the tie in place.
Step 15: The finished tie.
Step 16: The finished diaper changer!
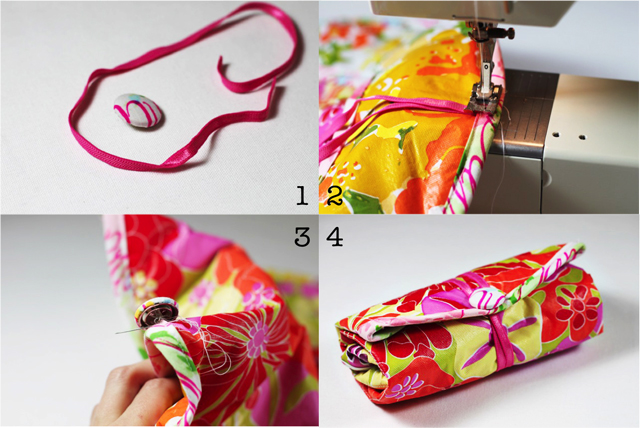
Alternative button/elastic closure
Step 1: I made a fabric button and used some colored elastic for the closure for Boo’s doll changer since she isn’t able to tie a bow yet.
Step 2: I sewed the elastic ends down into the bias tape trim.
Step 3: Added the fabric button.
Step 4: Easy closure!
A perfect baby shower gift or DIY diaper pad changer. Make a masculine one for daddy!

That is one of the coolest projects i have seen in forever. I love that you used a vinyl tablecloth and repurposed it. And i love that they are so quivk amd simpke to make but look so amazing. Sweet job. I am going to have to keep my eye peeled for some table cloths. Thanks for the pattern.
Love the way you made the pocket as an inner circle – can hold so much more that way – while ensuring it wont fall out! Genius!
I LOVE THIS!!! Such a great idea! I love taking things and re-purposing them for something totally different! Now I’m gonna head to TJ Maxx and see if I can’t score some of these tablecloths! Thanks so much for sharing! xoxo
coolest project ash!! i love to read craft tutorials and admit i don’t often actually make time to DO them….this one i want to do! : )
This is super cute – I’ve never seen a circular one and the pockets are a great idea! My kids are *finally* into their baby dolls – I see a couple of these in our future! 🙂
This is wonderful! So bright and original (and functional). 🙂 And congrats on your new sweet baby on the way!
Also, I just have to tell you that after reading through your screen printing tutorial again a few days ago I splurged and ordered the starter kit you suggested. Now I’ve just got to try it out! 🙂
I love this diaper changing pad. Lots of babies due at church. I was able to print out the pattern, but do you know why I can’t print the directions? I like to pin them above my sewing machine as I work. Thanks for you wonderful ideas. And congrats on the new baby to be!
Very cute! I love how you re-created the round Patemm changing pad using table coths! The Patemm pads are so expensive – I’m very glad you posted a pattern and tutorial – now I can make my own for family, friends and possibly to sell! Thank you!
I saw one like this in American Baby magazine and have had it hanging on my inspiration board for ever! Thanks for figuring it out for us, lol!
I LOVE this!! I just featured this post on my Wednesday’s Wowzers here:
Thanks for the inspiration!
~Alison
Love this! Currently in the process of making them and wondering if you use vinyl for your bias tape? That would be quite a task and since l am in the middle of the project I’m going to make one w fabric bias tape for now. Would love to know what you did. 🙂
I used fabric for my bias tape 🙂
I like this post. All of the Tablecloths are wonderful.
Love this! Just made one as my second sewing project ever! Thanks!!
How do I get the tutorial to print? I’ve tried everything I know (which isn’t much)
and can’t get it. Thanks for your help and even more thanks for the cool things you show us to make.
Hi Linda! Just click on the image that says “click for 4 page…” and a box should pop up that asks if you want to view or save it. Thanks! -Lisa
HI,
I’ve made a diaper changing based on your tutorial. I thought that your model of the diaper changing very usefful! Thanks a lot, i’ve a been a truly inspiration!
I don’t know if you want to see it, but I leave the link: http://tarapatices.blogspot.com/2011/10/perfeito.html
Thanks,
Sandra
Your directions and photos are outstanding! Can’t wait to make one.
Hi Ashley,
I had to include these change mats as well. So useable!
Thanks for writing up the tutorial.
I have featured it…along with some other gifts for babies here….
http://allysonadeney.wordpress.com/2011/12/06/17-handmade-gift-ideas-for-babies-teachers-with-tutorials/
….if you would like to take a look.
Ally on harrysdesk.
LOVE this. Im a beginner at sewing, as in I just got a sewing maching a few weeks ago. One of my friends is due in Feburary and I would love to make this for her and one for myself . Is it pretty easy for a beginner?
Just finished making one of these – thanks for the inspiration. I shared your tutorial on my Pinterest board – hope that’s OK?
This is such a great idea! I’m excited to get this project started!
Quick question, how much bias tape should I make or buy? What is the total size or circumference of the mat?
Thanks for this great idea & for the help!
I just made one and bought the extra wide double fold bias tape. It took less than 2 packages. I was able to use a good length for the tie and still had some left over. 🙂 Hope that helps! Happy sewing!
This tutorial is awesome, I have been looking at it for ages (aswell as all your other ones) , and finally made one. Super easy and quick, thanks so much for the pattern. Unfortunately our table cloths out here in Australia aren’t as nice as the ones you used, but maybe I can find some online somewhere.
Long time liker and follow all your blog and posts on Facebook
Sharing the love Aussie style. 🙂
Thanks so much for this tutorial! I made one and am usng it cnstantly. So much better than diaper bags.
I’m excited to discover this page. I need to to thank you for ones time just for this wonderful read!! I definitely liked every part of it and I have you book marked to look at new things in your website.
I am so EXCITED!!! I bought the table cloths to do this diaper pad. I’m going to get 2 pads out of one of the cloths and then 2 pads and 3 baby doll size out of another one! This has made my day – as crazy as that sounds!!
Super cute! Love this tutorial. I just scored a bunch of super cute vinyl tableclothes at JoAnn’s for $2.63 a piece. Our church is trying to raise money for the budget and we are going to be participating in a craft fair, is it okay for me to make some of these and sell them for that purpose? Just curious what your policies are on that! Thanks for letting me know!
So neat! What is the best way to wash/dry the finished product?
I love this and really want to make one for my new baby on the way but i can’t get the download to work!!!! help
I checked the post and the download is working for me. Are you clicking on the image that says – click for 4 page pdf pattern download? What happens when you do? Thanks!
This was one of the easiest projects, I bought everything tonight and already finished it. I love it and I hope my Son and his Wife love it to for their newest son!
I just finished mine. Even with the baby kicking like a pro ballerina and my current kids running in and out, I was done in about two hours, including coffee- and bathroom breaks! Wish I could post picts of my results! I LOVE it!
Just wanted to say that I LOVE LOVE LOVE this! I was able to alter my little girls changing pad based on your design. I’m FAR from being any sort of seamstress, but this was surprisingly simple (even for me!) Thank you so much for sharing! Now I don’t have to worry about our traveling and those cringe worthy airport changing tables! 🙂
wow I love this, my niece is expecting her first baby in August and would love to make this for her bundle of joy. I have a question do I place the pattern on to side folds to make the complete circle.
Thank you for a great changing mat