I have multiple work areas for projects and I’ve decided I need an ironing board for each one for convenience. This small tabletop ironing board is perfect for my cutting table and other work tables because I can move it around easily and it doesn’t take up a lot of space. It took me about an hour to make but it will save me about 30 minutes every day not having to move from work table to ironing board anymore. I made it using an old wood shelf, felt, fabric and a staple gun:
Step 1: I covered the shelf with a layer of felt first:
Starting on one side I used the staple gun to attach the felt and then moved to the opposite side and worked my way around to the corners last.
Step 2: I trimmed the excess felt and then covered the felt layer with the layer of fabric….
…….and stapled opposite edges ending with the corners.
Step 3: This is optional, but I applied a smooth paper backing to the bottom of the board….it helps the board to slide across surfaces easier when I am reaching for it. To adhere the paper you’ll need spray adhesive…..
…..and apply it to the back of the board:
I sprayed brown contractors paper with a layer of adhesive as well….then placed it on to the back of the board. These two layers will increase the adhesion (just like rubber cement works).
I used a razor blade to carefully trim the edges of the paper (be careful not to cut your fabric):
A smooth backing to the board….nothing to snag on fabric:
Finished tabletop ironing board that can be made in almost any size! Note: if you plan on doing lots of industrial-type ironing you might want to invest in ironing board cover fabric that can withstand excessive heat. It can be found at most large fabric stores.
I recently asked Shannon Hoffman of Three Angels Children’s Relief what would be some good items to send to the little girl that we sponsor at the TAH school. Do you know what the most coveted items are among the young girls there?
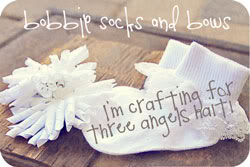
What simple items….and yet they can make one child so happy and feel good about themselves at school. I immediately whipped up some frilly socks and bows for Laurina’s care package…but immediately thought of all the children I wasn’t sponsoring: would they get a care package? did their sponsors know they dream of lace-covered white socks and frilly white bows? what if only Laurina receives them….the others won’t understand.
So I kept coming back to this idea:
If you are crafty, you can make the items….and if you aren’t so crafty we would love ready-made items as well!
Even just a pair of socks and a roll of white ribbon would help! Any style bow or sock is appreciated and welcome!
Just a few details:
:: Please email me or comment on this post if you think you can help so that we know to expect your package of socks and bows!
:: Make sure to include your business card and/or contact info so that we can include you in our final list of participants!
:: Mail items by August 15th to:
Lil Blue Boo (Bobbie Socks and Bows)
P.O. Box 1375
Palm Desert, CA 92261
The last donation drive for Three Angels we did was on Facebook……for fabric. The school recently acquired some new sewing machines for sewing classes.
So many of you sent in fabric from your stash for the sewing classes at the school…..we were able to send a HUGE box of pattern, notions, fabric etc for the girls to work with. Here are some photos that Shannon sent of some items they’ve made!
Grab this button and add it to your sidebar or blog posts to display the Bobbie Socks and Bows badge! It will show you are participating and help spread the word! Let’s do it!

<div align="center"><a href="https://www.lilblueboo.com/2011/06/bobbie-socks-and-bows-crafting-for-a-cause.html" title="Bobbie Socks and Bows"><img src="https://www.lilblueboo.com/wp-content/uploads/2011/07/participantbutton.jpg" alt='Bobbie Socks and Bows' style="border:none;" /></a></div>
A quick tutorial on adding trim to socks!
1. Start with lace and bobbie socks.
2. Turn your sock inside out and place the trim on the sock to start sewing. Stretch the sock as you sew the trim on….otherwise it will be too tight to put on!
3. Keep sewing past your starting point to add a second layer. Make sure to backstitch as you finish to keep the stitches from unraveling.
4. Turn the sock right side out and fold the top down. Easy and finished!
Thank you so much for considering this cause! I’m so excited to help these kids get ready for the new school year. Such small items can make such a huge difference! Three Angel’s Children Relief is trying to raise money right now to expand their school as well. The need all the help they can get! Please visit their site and consider helping further if you can. Thank you!
