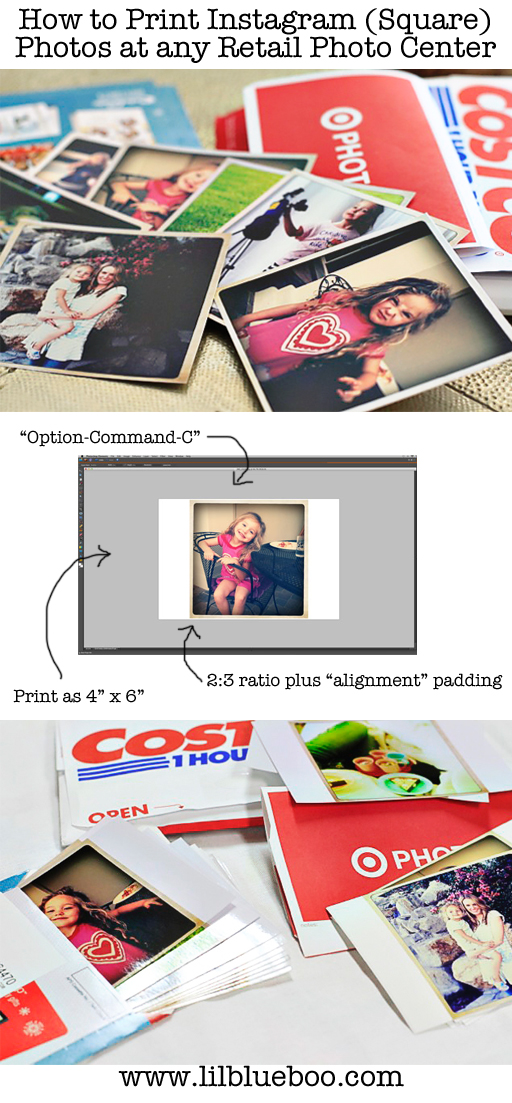
Not all photo centers are up to date yet on the new square photo craze….to print your Instagram or Hipstamatic type photos it can be expensive and hit-or-miss. I don’t like when someone tells me something can’t be done…..so after almost every single retail photo center told me they couldn’t print 4″ x 4″ square photos for me I was determined to figure out my own way. Below is my method for printing the square photos and it works at any photo center…..here are the reasons I like doing it this way:
1. I can upload my photos at full resolution at Costco (which is where I print most of my photos). At Costco, they are saved on the system so I can print them 4×6 or crop them later to print 12″x12″ (i.e. I don’t have to reformat photos more than once!)
2. 4×6 photos are always the least expensive to print! I can print as many Instagram photos as I want for 13 cents at Costco or 15 cents at Target etc.
3. A few photo centers can print Instagram photos now through mobile apps but I haven’t found one that prints matte or lustre yet…and their price is too high. I love the lustre finish at Costco so this method works for that!
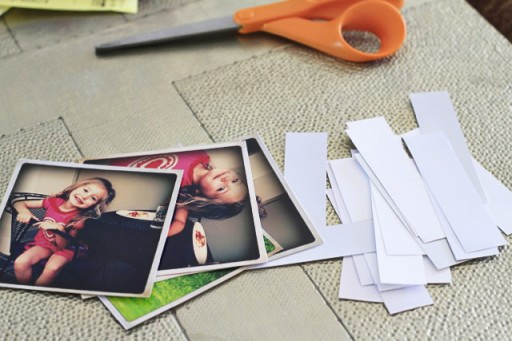
4. Minimal cutting. I have a long pair of scissors and I can cut the white space off quickly without having to worry about cutting another photo that might be next to it (if I had printed a collage).
5. It meets 1 hour photo requirements!
Note: If you don’t have Photoshop Elements, it’s pretty inexpensive to purchase and definitely worth the price to be able to quickly edit your photos! I use it for basic photo edits, drawing and adding text etc.
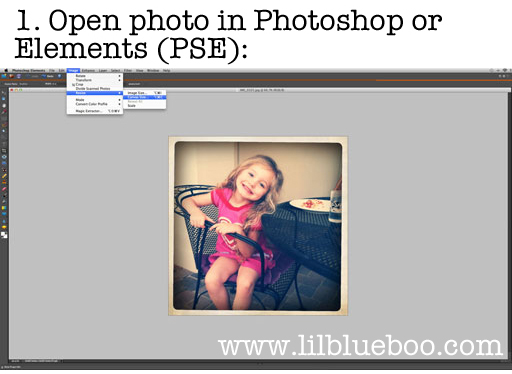
First, you need to download your Instagram photos. If you have the “Save to Library” setting set to “ON” in your Instagram settings you should be able to just download them by plugging your phone into your computer. If they aren’t on your phone you can go to Statigram, log into your account and just drag the photos to your desktop. Instaport.me is another website that lets you download all your photos in a zip file. Once you have your Instagram photos downloaded you can start resizing them:
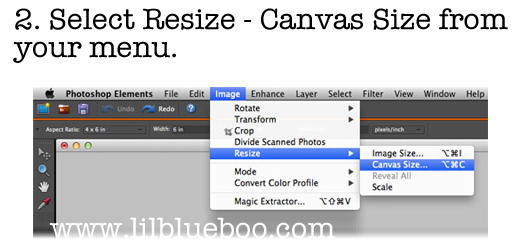
Now you’ll need to adjust your canvas size. Basically all I am doing is adding white space to either side of the photo to make it the equivalent of a 4×6″ photo size. I am also adding “padding” to account for the cropping that usually happens at photo centers and printer alignment differences. This will guarantee that you keep any photo borders and make sure your photos are the exact same size every time you print:
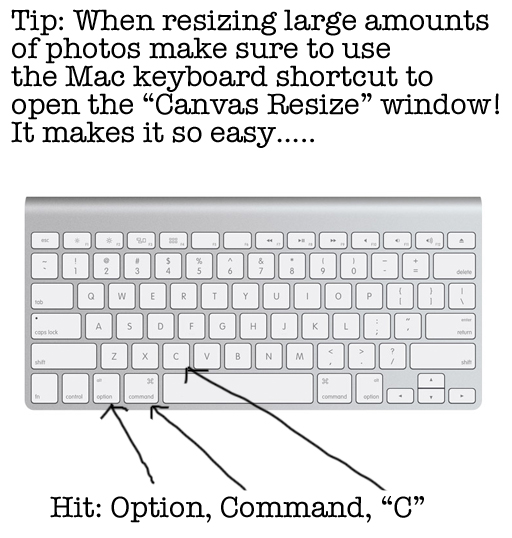
It might seem like this would take a long time but it’s actually very quick if you use the following shortcut:
Note: I think it is Control – Alt – I on a PC but I could be wrong…
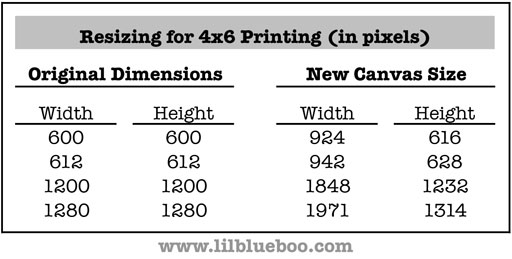
To change your canvas size in the next step you will need these measurements based on some standard Instagram measurements. If your square photo happens to fall in between one of the sizes you can estimate and it should work fine as long as you are keeping a 2 to 3 ratio:
**If your original dimensions are not on the chart you will first need to resize your image to one of the above.
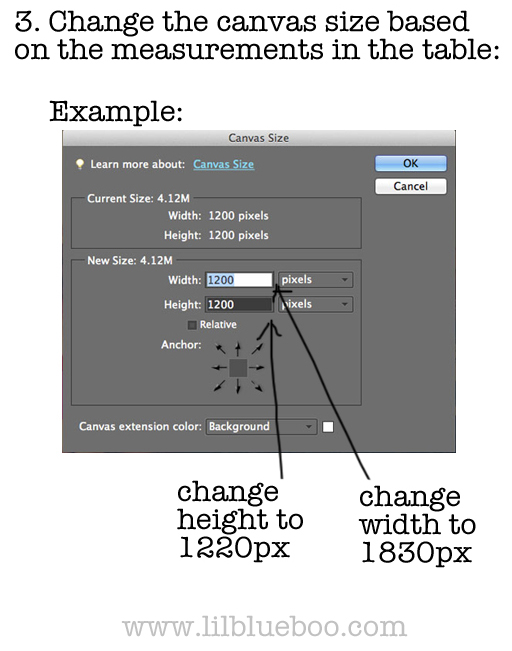
For step 3 just enter in the values from the table above (replace the original dimensions with the new canvas size) and then hit “OK”:
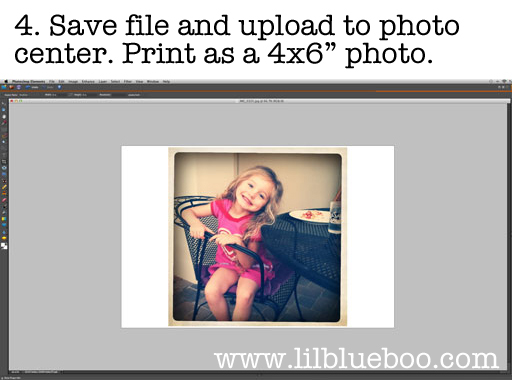
I just “x” out of my photo and hit “replace” when prompted so that it saves over my original Instagram. Then I upload my photo and print!
I recommend sending some test photos first before ordering hundreds. I have found that the alignment of printers can make a difference and some retail shops crop photos slightly even if you upload them with a 2:3 ratio (even though they’ll swear they don’t!). For example, my local Walgreens sometimes leaves the tiniest white border at the top of my photos….but Target and Costco do not. Costco crops the photo too much and makes the borders all wonky if you don’t add the padding that I included in the table dimensions. The alignment issue just adds extra cutting so try another store (even if it’s the same chain the printers can be different) and use that one going forward.
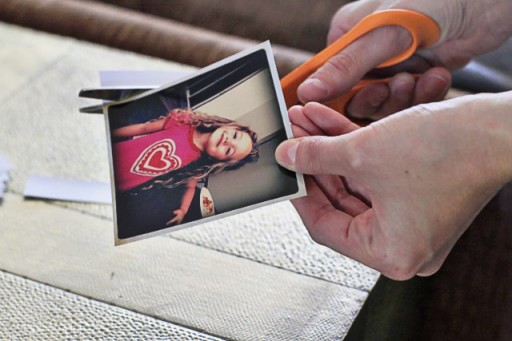
To cut off the borders I use the longest pair of scissors I have and it makes it a cinch:
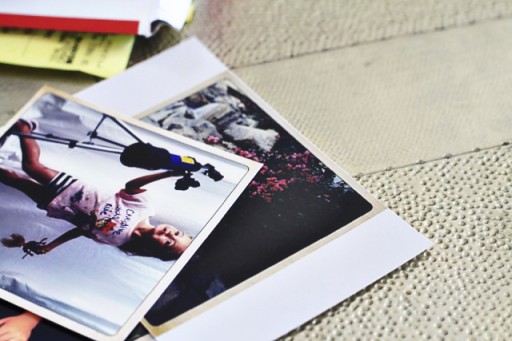
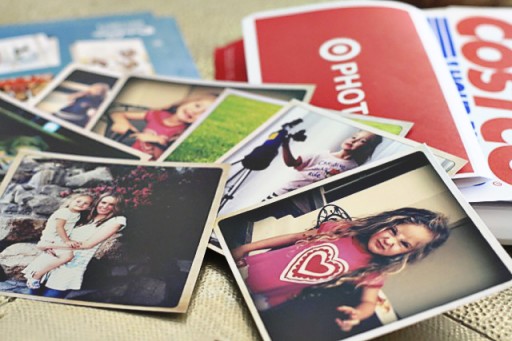
Easy, inexpensive Instagram and Hipstamatic photos:
Now to add these to my family photo albums!
Check out my whole series on getting on top of your photos and family memories! Click the image below!
Update: Someone asked if it’s cheaper to print the 4x6s rather than a 12×12 collage at Costco. The 4x6s are cheaper but the main reason I stay away from the collage is:
1. I like to have individual prints uploaded so that I can order multiple copies of a certain photo if I need to. If they were in a collage then I’d have to print all the other photos each time.
2. I can order a 12×12 of a photo and the resolution quality is high enough.
3. I’m picky about cutting and there’s less room for error if I’m cutting one photo at a time.
4. Uploading the photos is also an extra “backup”!
Hope that helps!

Thank you for the tutorial! I use free Picasa photo editing software, to print my instagrams. The only size I can print from there is about a 2.5 inch square, but it works!
For anyone interested in the method I use, just go into Picasa, choose your photo, create a collage (with one photo – or 2 if you want 2×2 instagrams) and from the dropdown menu choose “contact sheet.” Then click “create collage” and export it to send to a retailer. EASY!
Have you heard of Project Life by Becky Higgins? A fabulous product for documenting life simply, check it out! {beckyhiggins.com}
Love your blog and creativity, Boo!
Thank Lisa Marie! I spoke with Becky on a panel a few years ago! Love her Project Life stuff. I love seeing it on Pinterest! I tend to do all my albums in large expandable, format and my OCD is crazy about matching….i.e. if they weren’t all exactly the same I would lay awake at night thinking about it….sick I know haha. Here’s how I do mine: https://www.lilblueboo.com/2012/12/tips-for-creating-simple-and-timeless-photo-albums.html
Lisa Marie, Thanks for sharing how to print instagram photos without using photoshop!
It depends what size you want them. 2.5″ is too small for me but it’s a good sticker size!
Are you using iPhoto? Do you save them back to iPhoto when you’re done editing in Photoshop? I also wonder how the pricing works out on putting them all into a 12×12 collage and printing and then cutting apart vs. printing individual 4x6s and then cutting off the extra. I think costco is about $.09 per 4×6 print. I’ll have to look at their 12×12 prices. One last question. I’ve had a TERRIBLE time uploading to the costco photo center from iPhoto. Is that the process you’re using or did you find a work-around. Thanks for tolerating my rambling. :O)
FYI – Costco prints are $.13 ea ($.10 if you order 500 or more at a time) and the 12×12 prints are $2.99. Nine prints at $.13 ea. comes to $1.17. Cheaper than the 12×12. Good to know. I’m still curious about whether you’re using iPhoto and how you find that it works with Costco. Thanks for your amazing blog!
I use iPhoto. I just import them back in when done. I did price out the 12×12 and the 4×6 is cheaper….but the main reason I did it that way is :
1) there is less room for cutting error
2) I think it’s faster to resize the 4x6s than to make a bunch of collages.
3) I like having my individual files saved to Costco instead of a collage in case I just want to print one or two in the future…..I won’t have to print the whole collage.
To upload to Costco I always export my photos to my desktop at full resolution. Then once printed I back them up to CD. Then I always have an iPhoto version and a non-iPhoto version (just in case I ever needed to use a PC in the future).
Hope that helps!
use a PC! *gasp* :O)
yes. that helps. Thanks!
THANK YOU!!!! You’re a genius!
Love doing this. I know both Walgreens & Shutterfly will print 4×4 now if you order from their iPhone app. But, I actually prefer small sizes for my Smash book. I can add 2 2.75″ squares to 1 4×6′ which is perfect for my smashing! It also helps if and when places auto-adjust their printed prints.
Thanks Ashley this is terrific! I was going to print a few little instagram albums for Christmas but the cost was a little ridiculous : ) I’m embarrassed to say I have photoshop elements but don’t know how to use it. How did you get started with PSE – is there a book or series of tutorials you used? Some people say “just play around with it” but that hasn’t happened. Thanks! Lynne
Hello Lynne,
I learned PSE at JessicaSprague.com site. Her on-line classes are the best and the community there is so helpful. Whenever I have a question/problem I send out a Help and I get a quick response. Check out her site. The classes are self-paced and are accessible to you forever.
I just learned by playing around. Youtube is great for almost anything. Just be really specific when you Google something…..like “how to crop a photo in PSE” and you’ll find what you need! All you need to do is do file – open for the Instagrams though and then follow the tutorial!
I am delving into catching up on my photo printing and photo-book-making and am loving all of these photo posts as I work out my own system of organization. Quick question: do you make photo books for individual family trips, too, or just include those photos in the yearly albums? I’m torn on this one and you have your process so well thought out – I’d love your take on it.
Thanks for sharing all your great ideas!
I know it isn’t 1 hour, but I had great success with a web-based company called, http://printstagr.am/. They print Instagram posters, individuals, even bound little books. I got all 3 for Christmas and really love what you can do with them all. They are a great company with AWESOME customer service!
I use Picasa and save it to 12×12 size and can get 9-12 on a 12×12 sheet for 2.99. Thanks for sahring!
Love all your tutorial and ideas on photos! I am way behind and have made it my “2013 to do”. I am only behind about 15 years 🙂 I have thousands of pics in iPhoto. After you print them, save them to cd, and make your books, do you also keep them in iPhoto? Do you ever delete them after saving them to cd? Just curious… I think they are taking up so much space that my Mac desktop is running slow. maybe it’s not all the pics… who knows. I have a slight heart attack when I think of deleting, but can I keep them on my computer forever without taking up too much space?
Thanks!! You are amazing.
there is a free program for Windows computers called photosheet that allows you to do this as well. No need to spend the $$ on photoshop.
I think the largest you can print them though is 2.5″ x 2.5″. I like mine the size of a 4×6 photos for albums.
Doing it. right. now.
Another option is to create a large poster of your prints.
I recently created this website that is so easy to use. You can create 24″x24″ or 24″x36″ posters of your instagram photos. It is a drag and drop interface so you can put your photos where you want. Super easy and fast shipping. Check it out at .
-Karen
I’m having a hard time finding where to get the zip file through Statigram.. can you point me in the right direction? This is fantastic btw, thank you!
Hi! Great tutorial! I tested your PC shortcut and it works, but for image resize. Ctrl-Alt-C opens the canvas size, so you were close! 🙂 I was wondering if you could tell me how to get 2 3×3 size ig’s on a 4×6 canvas.. I can’t seem to do it! THANKS!
Michelle
Scrappin’ For Kenzie
Hi! Thank you so much for posting this info! But my canvas size is 2340×2340 and I can not figure out how you came up with your numbers in your chart to change mine?? Please help!!
Hi Jodie! You need to first resize your image from 2340×2340 to 1280×1280 (since it’s the same ratio). Then you will be able to adjust your canvas size using the chart. Thanks!
I have the same problem as Jodi but when I try to resize to 1280 x 1280 I get a warning pop-up. It says, “The new canvas size is smaller than the current canvas size; some clipping will occur.” My image gets completely clipped if I hit okay. Is there anyway around this? Or am I doing this completely wrong? Any help would be greatly appreciated.
I too have the same problem as Denise and Jodi. Any way to trouble shoot this problem would be greatly welcomed. 🙂
Just use Hipstamatics Print Lab. So easy without the work.
Or you can just go to oddprints.com. You can make your photo any size and then download it and print it out wherever you want. All for free! And you don’t have to have Photoshop.
How do you do this exactly? Thanks!
This is the BEST place to print INstagrams!
they have a selection of paper types & do all the cropping for you!
But they’re like .85 cents EACH! OUCH
p.s. Costco is not a photo lab! The quality is horrible
i use a paper (photo) trimmer which costs around $20 at any craft store in order to cut apart my collage prints without worry of making a mistake with scissors. i feel that is cheaper than buying $99 software. if you use PhotoSheet to make your collage, you can choose how many of each image you want to place on the collage.
It’s very straightforward to find out any topic on web as compared to textbooks, as I found this post at this site.
Thank you! This is perfect! I’ve been using postal pix to print my instagrams for awhile now, but the quality has always seemed kinda crappy, and they’re expensive. I love Costco’s lustre option too. Can’t wait to try this!
Thanks for sharing! Give life to memories beyond the screen with instagram print services from Snapstagram :