What are party printables?
Party printables are digital files that you download to your computer and print off on regular 8.5″ x 11″ paper. They can be assembled in a variety of ways allowing customization for the perfect party.
Where can I purchase party printables?
We offer limited edition party printables by some amazing artists in the Lil Blue Boo Digital Shop.
How do I print the files?
You will need Adobe Acrobat Reader to open and print your files. It is a free download from Adobe.com. Make sure you have the most recent version. When printing your files please keep in mind that color will vary across printers and types of paper. Make sure to do a test print on your home printer. If you don’t like the outcome you can always take it to a professional printer or office supply as well.
Use a sturdy card stock or premium matte photo paper for best results.
What printer do you recommend?
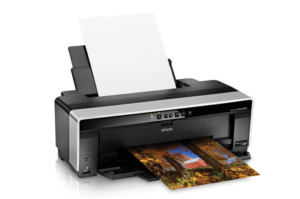
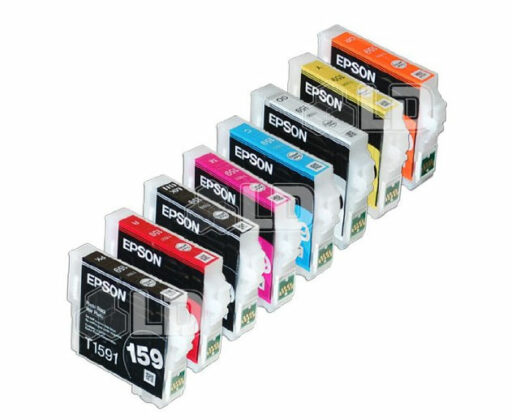
Color and quality is going to vary across printers and type of paper you use. I personally use an Epson Stylus Photo R2000. It has 8 large, separate ink cartridges and wireless networking. There is also a place on the back to add a roll of canvas for continuous printing.
I also love that the Epson ink cartridges last a long time and are individual colors. I never seem to run out….but I do use up more gloss optimizer than ink:
How many times can I print the files?
You can print your party files as many times as you like or send them to your local office store for printing. All Lil Blue Boo Digital files are copyrighted and protected by U.S. copyright law. You may not sell items you make from these files or sell the files themselves. You cannot email or share these files with others.
Can I customize my party printables?
Yes! We like to put as much creative leeway into the customer’s hands as possible. Our artists have provided a blank invitation and suggested fonts with your package to help you customize your party to your heart’s content. Click here to download our tutorial on using Microsoft PowerPoint to customize your PDF files.
What else will I need when preparing my party package?
Since printable packages are digital files, you will not receive any physical product with your purchase. Here is a list of items you might need depending on which package you purchase:
Tape and Tape Runner
You’ll use tape to attach cupcake toppers to toothpicks. Where tiny hole punches are needed, it’s best to reinforce the back of the paper with tape before punching. A tape runner is great for attaching flags and tags.
Scissors
Many items like party signs, garland and tent cards are easily cut out using a basic pair of scissors.
Scrap Punches
Scrap punches come in several sizes. Most printables include 2” circle shaped tags but these can also be cut with a scalloped edge punch. There are also some packages that include square shapes tags. Square tags can also be cut into a circle shape.
Envelopes
Invitations work with 5×7 (size A7) envelopes. These can be purchased at office supply or craft stores.
Thank you notes work with 4×6 (size A6) envelopes. These can be purchased at office supply or craft stores.
Toothpicks and Lollipop Sticks
Other Items
String or Ribbon for Garland
How can I make the most of my party package?
Party packages can go a long way if you are willing to think outside the box a little bit!
When printing your garland here are a few ideas: print several sheets to a page to make mini garland for a cake. Here’s an example: https://www.lilblueboo.com/2011/12/happy-birthday-mini-bunting-a-tutorial-and-free-download.html
Circle or Square Tags
The most basic party printable. Typically used for cupcake toppers. But there are so many other uses!
Cupcake Toppers
Lollipop Labels or Tags
Treat Labels – Decorate popcorn bags or plain cups to fill with treats.
Garland – Punch out the tags and add to string to make a mini garland. Punch out additional shapes from patterned or solid paper.
Table Decor – Make table confetti, decorate napkin rings, cup embellishments, etc.
Stickers – Print on sticker paper to make easy stickers!
Toothpick Flags
Garland/Bunting – Flags are also great for making mini garland. are great for making garland.
Food/Cupcake Toppers – Who said cupcake toppers have to be round or square?
Cupcake wrappers
Treat Cups – Put a cupcake liner in the bottom and use double sided tape to keep it in place. Fill with nuts, candy, popcorn etc!
Patterned Papers
Garland/Bunting
Backgrounds
Bottle Wrappers – Decorate water bottles with your party theme by cutting 2″ strips of paper and wrapping around the existing label.
Napkin Rings
Doilies – Use those fancy scrapbook edge punches to make doilies and plate liners.
Paper Chain Garland – You remember these….like the ones you make for your Christmas tree!
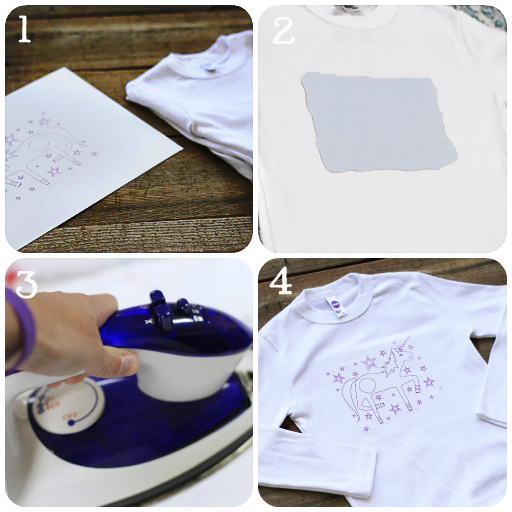
T-Shirt Transfer – Cut out shapes and print onto t-shirt transfer paper.
Tent Cards
Jar Labels
Making Cupcake Toppers
Cupcake toppers can be made with regular toothpicks. You can also use lollipop sticks or cut wooden kabob skewers down to make them stand up a bit higher.
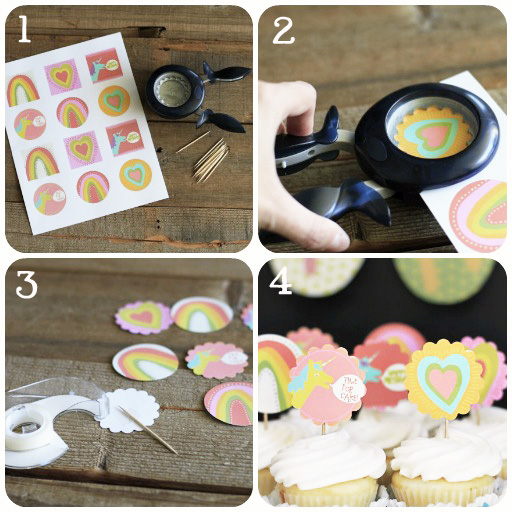 1. Supplies: Cupcake Topper Designs, square/scallop/circle punch, tape or hot glue gun, toothpick or lollipop sticks.
2. Punch out designs.
3. Tape or hot glue your toothpick to the back of the paper.
4. Place cupcake toppers in your cupcakes. Voila!
Making Toothpick and Straw Flags
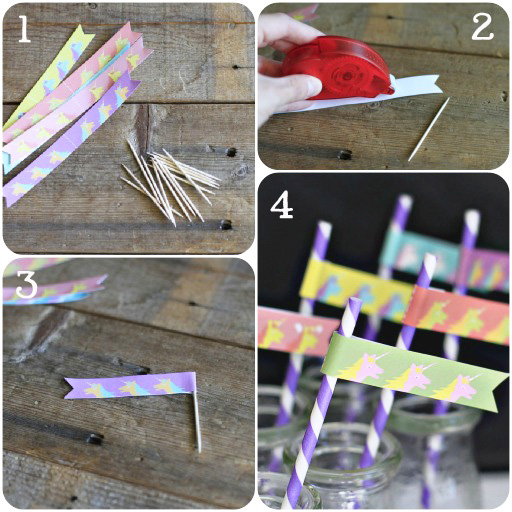 1. Print and cut out flags.
2. Use double side tape or glue stick to close the flag.
3. Before closing the flag, place toothpick in between.
4. Use same technique for straws.
Making Bunting/Garland
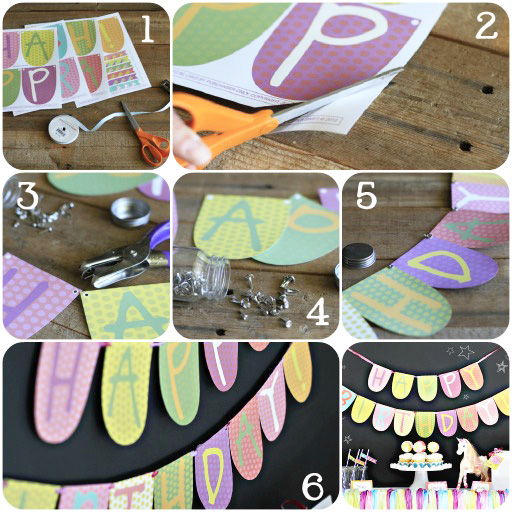 1. Print out the banner pieces.
2. Using scissors, carefully cut out the banner pieces.
3. Use a hole puncher to punch holes in the corners of each piece. (apply clear tape on the back to reinforce the hole!)
4. Brads, string or ribbon are options for connecting your banner.
5. Brads can connect the pieces but your banner will be slightly shorter.
6. Ribbon or string make a wider decoration. Display for all to see!
Making a T-Shirt Transfer
1. First, print your picture onto t-shirt transfer paper using a regular ink jet printer.
2. Cut out your image and place down onto the t-shirt.
3. Use a hot iron and follow direction to press the transfer into place.
4. Peel off the transfer and it’s done! (click here to see an idea for a party t-shirt coloring activity!)


