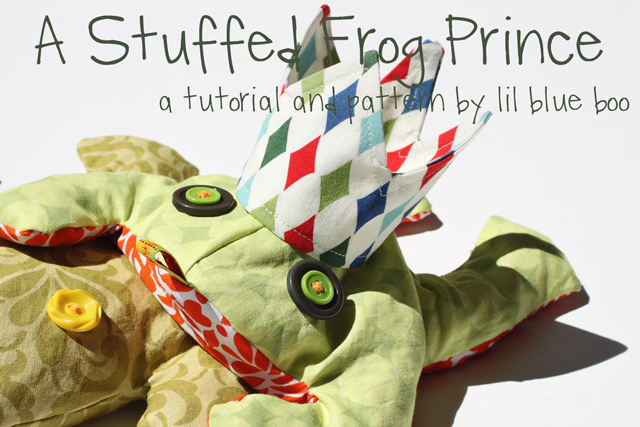
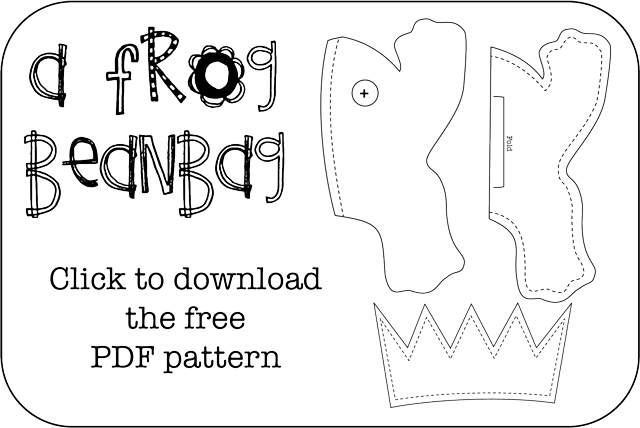
I’m slowly updating some older Lil Blue Boo patterns to make them easier to download. This is an updated version of the Stuffed Frog Prince Toy Pattern with both the frog toy/beanbag and frog prince crown pattern combined into one PDF. The very first frog I made was a VERY OBESE frog….but we still have him and he makes a great doorstop.
So many options….here’s just a few:
Mix and match fabrics and ribbons to create unique frogs for toys and gifts.
Stuff with soft polyfill or make it a beanbag.
Use strategically placed fabric designs to replace button eyes for children under age 3.
Add a rattle in the middle and ribbon tags to make a “taggie” infant toy.
How to make the frog:
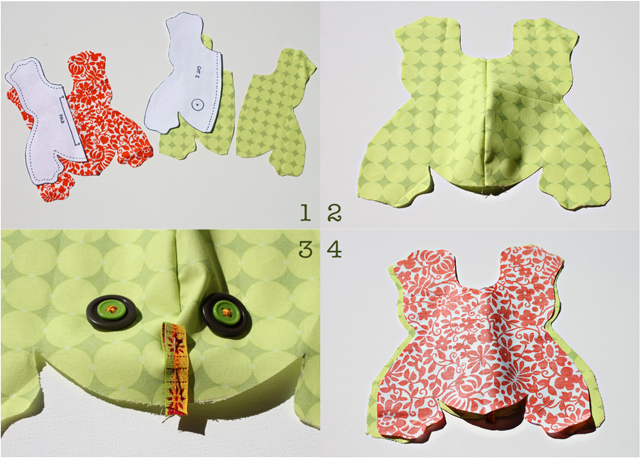
Step 1: Cut two top pieces and one bottom piece on the fold using the pattern download.
Step 2: Place the top pieces right sides together and sew them together along the top with a 1/4″ seam.
Step 3: Add button eyes and a pin a ribbon tongue in place.
Step 4: Place the bottom piece on top of the top piece, right sides together and sewed all the way around using a 1/4″ seam….leaving a 2″ gap on the inside of one of the legs. Notch all of the curves and turn the frog right side out and stuff! Sew the 2″ gap closed with a needle and thread.
To make the crown:
Note: You can modify the crown to have more “spikes” if you want or shorten it a little…..but it will be a good starting point if you want to “crown” your little frog prince.
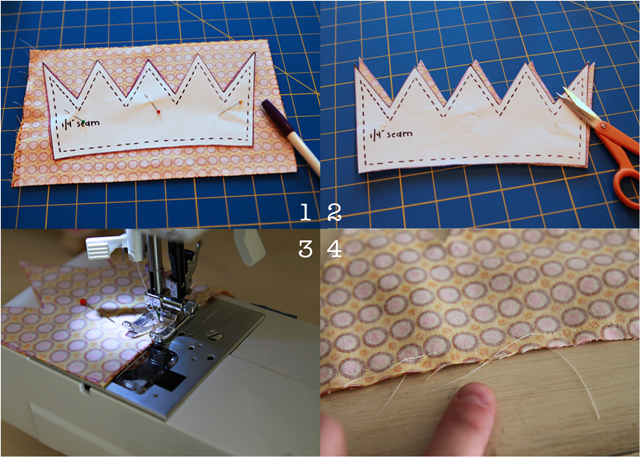
Step 1: Place 2 piece of fabric right sides together and pin your template together with them. I use a disappearing ink pen to trace my crown just to make sure it is perfectly proportioned when I cut it out.
Step 2: Carefully cut out the crown pieces and re-pin together if necessary.
Step 3 & 4: Using a 1/4″ seam, starting at the bottom middle of the crown, sew all the way around the crown. You might want to draw your sewing lines with your disappearing ink pen to make sure your point are perfect because if they aren’t you’ll be able to tell! Make sure to leave a small 1.5″ inch gap at the bottom so that the crown can be turned right side out.
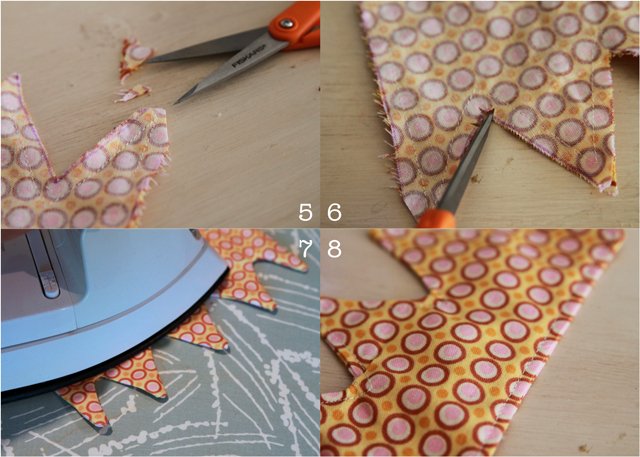
Step 5 & 6: Carefully cut trim the seam allowance around the points and notch around the “valleys”, otherwise you will have too much bulk when you turn it right side out.
Step 7: Turn the crown right side out. Use a skinny object like the end of a small paintbrush or the dull end of a kabob skewer (that is what I use) to push the tiny points out. Then iron your crown flat.
Step 8: Topstitch 1/8″ from the edge all the way around the crown.
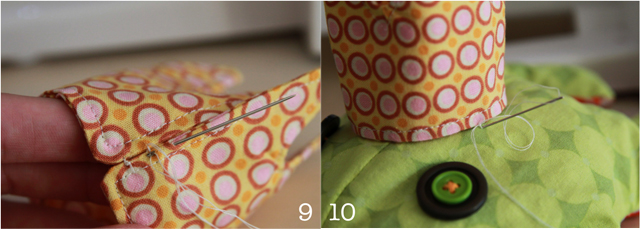
Step 9: Using a needle and thread, use a blind stitch to sew the crown together in the back. I knot each stitch as I go.
Step 10: (optional) Use small knots around the base of the crown to attach the crown to the frog.
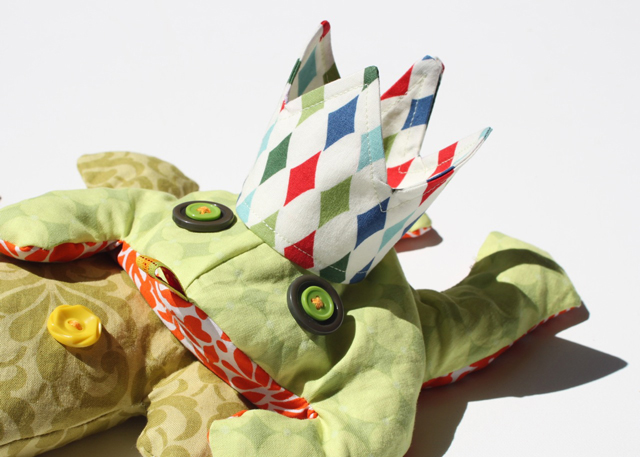
A finished frog prince!
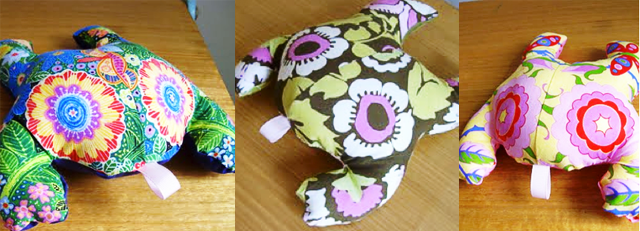
Margaret from With or Without Nap made these adorable little frogs using this pattern download. I love how she used the fabric design for the eyes (and I’m such an impatient crafter…..I love anything that eliminates a step from a project!)
Copyright © 2009-2011 by Ashley Hackshaw/Lil Blue Boo. All rights reserved. This frog pattern is for personal and home use only.

My daughter Anne-Louise is gonna love this! Thanks for sharing Ashley!
What a cool freebie!! So easy that even a an ‘all-thumby daddy’ might be able to complete 🙂
adorable!!! my daughter will have so much fun making one of these with me! thank you for sharing!!!
I love this frog.
You saying how obese your original frog was that he works well as a doorstop got me thinking. Could you make doorstops like this using washed gravel/chippings instead of stuffing?
What kind of “stuffing” did you use for your frog? I was thinking poly-fil and lentils or pinto beans on the bottom…
these are fantastic!
we’ve one similar, bought at a craft fair, filled with corn that we keep in the freezer. serves as our “ice pack” when boo boos happen. but how fun, to make others as honest-to-goodness playthings!
thanks for the generous pattern.
Thanks for the tutorial! I am going to add a crown tomorrow to my frog! He is very handsome and was fun and quick to make. Thanks again!
Was your bottom piece smaller than your top piece? Mine was and I had trouble sewing them together.
Mine is smaller!! I’m glad I’m not the only one thinking this is a problem. I think I’ll take a break and try sewing it together tomorrow.
Oh myyyyyyyyyyyyyyyyyyy! I just found your site! First of all, I wish you health and blessings. Second of all, I stopped in my tracks when I saw the frog tutorial! My mom made me a froggy in the 70’s out of old green olive tone fabric and I miss my froggy very much! This frog looks almost identical! i believe she used a McCalls pattern. My mom has passed away sadly but now I can try to replicate the froggy that she made and have him sit on my nightstand to help me focus daily on the love my mom showered me with and help give me the inner sight to be that kind of mom to my two boys.
God bless,
Elaine
Just made this adorable frog. Simple, easy and very cute. Thanks for the pattern. My grandbaby will love this.
HI,
In 1979 in Massachusetts, which was before I sewed, I went to a fair and purchase a bean bag that was a frog with a zipper for a mouth. If you unzipped the mouth and putting the fabric out, the beans then when in the fabric which was a prince. Any idea on where to get the pattern or how to make your pattern into this idea.