I love these shopping cart covers…..and they also double as high chair covers! I never left home without mine when Boo was still riding in the front section of the cart. I just made one for my niece. You can download my free PDF pattern below…..it prints out onto twelve 8.5″ x 11 pages and you just have to tape them together at the guide points. It’s a large file so you’ll have to unzip it once downloaded.
(more after the jump)
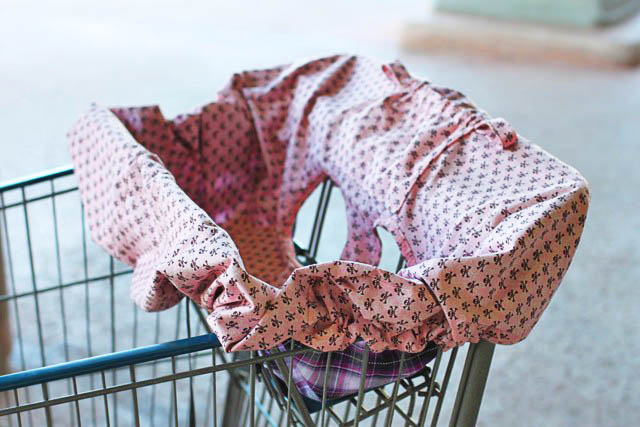
The cover requires a LOT of fabric (see fabric requirements in pattern) but it will fit any size shopping cart….including Costco and Sam’s Club! I call it my shopping cart “shower cap”…..because that it kind of how it fits. It makes the shopping cart soft and comfy and covers all the germs!
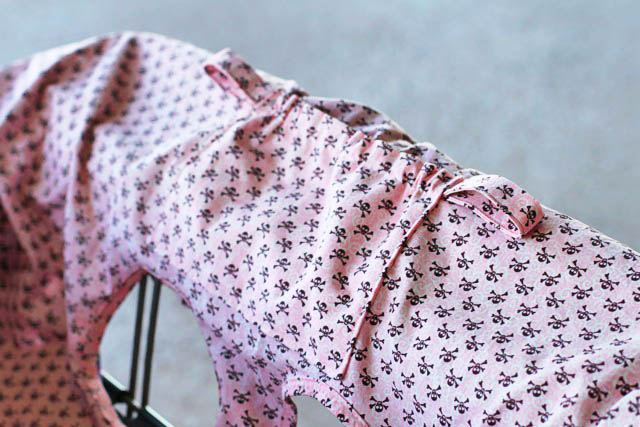
The straps fit right through the back:
The pattern has an optional pocket to hold toys and juice cups (or Cheerios like I used to fill it with). There are also optional straps to attach toys to:
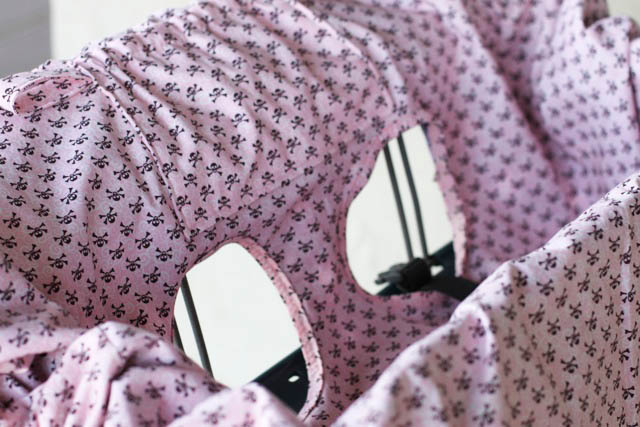
Large comfy leg openings:
Once you print off the PDF pattern here’s how you make it:
Step 1: If you are using 60″ wide fabric you can skip to step 8. If you are using 42″ fabric you’ll have to patch together some pieces on the side (I don’t do a middle seam because it’s not as comfortable).
Step 2 and 3: The fabric in the photo is folded twice so that the pattern “fold” marks will line up with two folds.
Step 4: I notch with my scissors where I need to patch fabric onto the side. The two additional pieces I ended up having to cut for the patching were 17″ x 8″.
Step 5: I patched the side pieces on.
Step 6: Now I can cut my pattern from one large piece of patchworked fabric.
Step 7 and 8: You’ll need to cut 2 large circles for the cover. I cut one piece from 42″ fabric and the other was from 60″ fabric which didn’t need any patching.
Step 9: Lay both circle pieces on top of each other right sides together. If you want to add cotton batting (to make a more padded cover) you’ll add it at this step. Cut an identical circle of batting a lay it as a third layer on top of the other two layers.
Step 10: Sew all the way around the circles with a 1″ seam and leave a gap of a few inches so that it can be turned right side out. Trim around the circle so your seams are down to 1/2″.
Step 11: Turn the cover right side out and iron all the seams flat.
Step 12: With a very long stitch (my machine was on the longest stitch possible) topstitch all the way around the cover 1″ from the edge.
Step 13 and 14: Fold the cover in half and line up the pattern again with what you would like to be the front of the cover. You’ll cut out the circle on your pattern for the leg openings.
Step 15: Mark and cut out the leg opening….you should be cutting through all 4 layers of fabric.
Step 16: Unfold the cover so it’s flat and take your bias tape and start pinning it around each leg openings:
Step 17: The bias tape should be pinned all the way around both leg openings to cover the raw edges.
Step 18: Carefully use a zigzag stitch to sew the bias tape to the cover.
Step 19 and 20: Fold the cover in half again and flip it around so you can line up the pattern with the back of the cover. Cut out the “I” line on the pattern and mark the line through the pattern with a marker. You’ll want to mark it on the opposite side of the cover as well.
Step 21: Use a zig zag stitch to sew around the line almost like a button hole.
Step 22: Use a razor blade to carefully cut the line open without cutting any of your zig zag stitches.
Step 23: Here’s what the strap hole looks like on the other side of the cover.
Step 24: For the optional pocket, cut out two pieces of fabric on the fold using the pocket template.
Step 25: Place the pocket pieces right sides together and starting at the bottom of the pocket sew all the way around as shown in the photo leaving a small opening at the bottom.
Step 26: Turn the pocket right side out.
Step 27: Topstitch along the top of the pocket with a 1″ seam.
Step 28: Open up the seam at the side/top of the pocket to insert a 6″ piece of elastic through.
Step 29: Attach the elastic on either side of the casing at the top of the pocket by sewing the openings closed again. The elastic is smaller than the pocket so you’ll have to be careful not to lose your elastic at either end.
Step 30: For the accessory straps cut 2 pieces (not on the fold) using the template.
Step 31 and 32: Fold the accessory straps in half, open back up and then fold the edges in again and fold shut. Sew along the edge to close the folded edges of each strap.
Step 33: Pin the pocket in place (about a 1/2″ above the leg openings) and fold and pin the accessory straps underneath the top edges of the pocket.
Step 34: Sew along the side, bottom and side of the pocket to attach it to the cover.
Step 35: Cut 2 pieces of 48″ elastic.
Step 36: Attach a safety pin to the one end of both pieces of elastic and thread it through the edge opening of the cover:
Step 37: Once the elastic is threaded all the way around, tie the ends together and sew the opening shut.
Step 38: A finished cover!
So many beautiful fabric options you could choose!
We get asked about our cover wherever we go!
Feel free to make as many covers for yourself and for gifts. Enjoy!
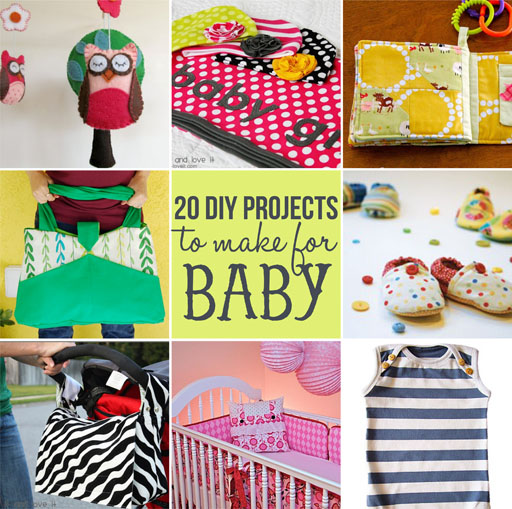
Check out my recent roundup:
This is an oldie but a goodie…..updated with new projects for baby gifts and baby gear! I love giving handmade gifts for baby showers and I made almost all of Boo’s gear and clothing when she was a baby…..that’s how Lil Blue Boo started!






Oh so fun! We have one (store bought) and have enjoyed so much. Who ever thought of this idea was pretty smart.Yours is way cuter than my store bought one.
I am going to feature this soon my dear!!! 🙂
thank you for the Freebie!!!!!!
xo
Keren
Very nice but did you know germs can move? I mean, if they ar on the cart they get on the cover etc…
Thank-you so much for sharing this! Very generous of you. 🙂
My youngest is a cart-chewer and I’m too cheap to buy an off the shelf cover so this is perfect!
YYYYAAAAYYY! You did such a good job. I LOVE IT! Another talent that blows me away. <3
Thank you…. I once bought a pattern off of ebay , just like this… and made a couple, then put the pattern away…..
Now, I have a new grandson.. and a new niece on the way… such a wonderful idea for a gift.. Couldn’t find the pattern, couldn’t remember the pattern… This one is almost like the other, only better.. NOW, I can do shopping cart covers for a gift
Love this shopping cart cover, but how do I save and or print the instructions? The pattern is not problem, but I can’t figure out how to save the directions. Thanks for your help.
Linda
COPY AND PASTE.
At the top or bottom of the instructions, click, hold and highlite the instructions. On the highlited area, right click and click on “copy”. Go to Word and click to get a new blank document. At the top of the new document, right click for “paste”. That’s it unless you want to play with the doucment after you paste it.
I love this! I bought one on a trip to Houston, because we have nothing like that in England and I have been looking for a pattern ever since. So thank you, Ashley!
Hello, I love this, just wish I had found before buying the store pattern 🙂 It took me FOREVER to figure out that pattern!! Yours is so simple and easy to follow 😀
I have 4 children and didn’t really apreciate these with my first three children. 3 weeks after I had my 4th I got really sick with the H1N1 and was hospitalized for three days and then on oxygen for several months.
SO I went and bought the pattern and made one and LOVE it!! I have since then made them for a couple babyshower gifts 🙂
The only thing I did differently is I used a Towel (two large towels sewing together) for the backing (or under material) It is a little more heavier BUT easy to wash and good for spills OR on those rainy day carts!!
Love the thought about the backing being a towel.
This is amazing, too bad I’m 62 and no longer have a use for it. I wonder if you should patent this and sell it???
This is soooo nice. Too bad I’m 62 and no longer have a use for it. Great for those germ a fobes too. I wonder if you should get a patent on this and sell it to those that have no sewing skills???
I love this project! I can’t wait to finish it. Thanks for the tutorial. But, I don’t really understand steps 13-15 and 19-20. The circle holes seem way too close to the “I” hole. How am I supposed to lay it out to cut it? I’m sure there’s something I just don’t understand, because everyone else seems to get it.
Nevermind, I figured it out! After I cut FOUR leg holes! I think I need to work on these projects during the day when my mind is working…
How did you figure this out?? I have been trying to and they just seem so close together!
Hey!! I love the shopping cart covers! I actually just pieced my pattern together and I’m about to get started but I have a question…
1. I really don’t understand “patching” the side pieces on? Will they show in the final product?
2. How big are the circles in #7?
Thank you very much!!
Love this I have one my parents bought for me from walmart but it doesn’t fit a Costco cart 🙁 any one know if this one will?! I really want one for when we go to Costco thanks
Never mind I read the top half and didn’t before…..darn ADHD brain 😀
I’d have to have to have the dress, basic tees, And spring tee. Of course the cute jeans.
032412
Hi Ashley:
I’m loving this shopping cart cover and am in the process of trying to make one for my granddaughter. I’ve never made one before or even used one so perhaps that is why I am having trouble figuring out the directions.
I have just finished sewing the bias tape around the leg holes. The holes seem to be approximately 17″ from one side and 24″ or so from the other. Which side is the front (i.e. the part that covers the handle of the shopping cart)? I am thinking the front is the part that measures 24″. Is this correct?
I need to know so I will be sure to attach the pocket and toy loops in the right place.
I’m also having a problem figuring out exactly where to cut the slot for the safety strap. There is no clear picture of the strap hole placement on the finished cart cover. The marking on the pattern looks too close to the leg hole. The marking also appears to be horizontal to the leg hole and I would think it need to be a vertical slot.
Can you please help me? Sorry to be so “slow” but I am well under way with this project and must finish it asap.
Thanks for ANY help you can provide.
Pam Frederick
[email protected]
I was confused about this too until I looked closely @ the picture….photos 19 & 20 show how to place pattern for leg holes & belt “buttonholes.” The leg holes go closer to the cart handle; the belt holes toward back. Hope this helps. My cover turned out so cute, I get lots of compliments. Used an old white sheet for the back – cheaper than buying fabric & isn’t visible in the cart.
help!! i am confused! i need to understand, because my fabric has a direction, on the pattern, are the leg openings on the half of the cover that is where the handle is, or where the seat back is? it isn’t written on the pattern…. not having made one of these before, it looks like it should be on the back, so more fabric comes over the front, and has pocket space – i am stuck without knowing how this is!! please help!
This is a topic that’s close to my heart… Best wishes! Exactly where are your contact details though?
I just made this for my granddaughter and have a few comments and tips.
First of all, 5.5 yd of fabric for 42″ fabric was way too much and that’s with piecing, pocket, etc., I had a full 2 yds. left over, so just get 3.5 yds!
Also, you’ll need two 8″ x 22″ pieces of fabric to piece for 42″ fabric, instead of 8″ x 17″.
The placement of the pocket wasn’t on the pattern and I noticed someone else had a question about this. The pocket should go an inch or so above the leg holes on the LONGER side of the circle because the longer side fits around the handle of the shopping cart.
I found it easier to zigzag stitch around the leg hole openings before sewing on the bias tape. Also, the example shown actually used the fabric for the bias tape which is really cuter. Just cut two strips of fabric about 2″ wide and 22″ long. Fold in half and iron, then fold ends in to make 1/2″ bias tape.
i cant download the pattern
i cant download it
Look like it’s working fine. When you click on the download image a box should pop up. Do you not get that box?
Thank you “sew” much for the free PDF shopping cart cover and the step by step directions. they were great, easy to follow and complete. I need more practice on the strap openings. I was wondering why you used two pieces of elastic. I used what l had, which was one strand of 1/2″ elastic, which seems to be working just fine. I can’t wait to go back and explore your site more!
Pretty! This has been an extremely wonderful article. Many thanks for supplying this info.
I decided to qsuillow it as it is really big and now it is a car pillow when not in use. The quillow went on the back just above to openings for the safety belts. I used a square 13 3/4 inches by 27 inches (folding it)and took 1/2 inch seams and sewed it on. The pillow is turned down over the fold.
Seems to be working and I also put velcro anchors on 4 corners. I went to Walmart and put it in one of their baskets for the spacing on the velcro.
I made one of these. I did a HUGE cheat though….
I used a king size pillow sham. Gorgeous in design. Just cut the holes for the legs. Add ties. It has received so many compliments.
LOVED seeing this idea. And as a grandma….made them for grandchildren and other young kids.
Hi I would love love to make one of these could you tell me How far in to measure for the leg holes or point me in the direction of a tutorial using the pillowcases.
Many thanks x
Just wondering- when using this on a large cart like at Costco, do the leg holes line up properly?
Hi, i don’t understand the use of the “I” line. Could you explain it to me? thanks a lot.
thank you for posting this free pattern. Could you please make a note in the original directions about the amount of fabric that you need since you don’t need five and a half yards? 3.5 is plenty for the 42″ fabric. I was disappointed when I found this out because I could have saved some money at the fabric store.
Could you make this into a double cart cover? For two kids? Would you just have to widen it in the middle and add additional leg holes?
You could try to widen the leg holes to accommodate two 🙂
I’m trying to make this but I’m having trouble piecing the pattern together. Can you tell me how long it’s supposed to be on the folds?
these are so cute! How do they work on carts from places like target and Meijer?
did you use batting in the polka dot covers?
Thank you for this free pattern! I made one with some minky and some cotton I had just sitting around waiting for a project. The instructions were easy to follow. I too was wondering why the two pieces of elastic? I just used one piece of 3/4 inch since it’s what I already had in my craft room.