My TOMS were looking a little dingy so I decided to spruce them up with a little spray paint!
My TOMS were looking a little dingy so I decided to spruce them up with a little spray paint!
I made my first memory quilt…out of Boo’s old dresses! I’m sure there are many of you out there that are quilting experts, and that there are certain ways of doing things the “quilting” way….but I wanted to take a fresh look at quilting and make it up as I went along. I love that each square tells a story! Boo can point to each square and remember a special outfit she had and a memory associated with it!
I love the way the quilt turned out. It’s sturdy, double sided, and full of memories….it’s upcycled/recycled!
Instead of actually t-shirts I took Boo’s dresses from the last few years…..all the ones that I’ve made for her. Most are pretty worn out and had some stains on them…..so they couldn’t have been sold or donated.
Each dress has special memories and instead of putting the all into storage I decided to cut them all up and make them into a big quilt that she can enjoy for years to come.
First I made a square template: 10″ x 10″
I used a rotary cutter to cut out as many squares from each dress as I could:
Here’s my big stack of completed squares:
Boo helped me to place all the squares in a pattern. It’s double sided so we had 7 squares by 7 squares for each side of the quilt. I then stacked them up in order so I could keep them straight.
Instead of interfacing, I used spray starch to coat each square and I ironed out each piece. Then I rechecked my square template and trimmed any wonky edges so that each square was perfect.
I began to sew each square together in rows. 7 squares made up each row.
After each row was finished I ironed the seams flat.
Here are all my rows finished:
I laid out all the rows again just to double check my design.
Then I began to sew all the rows together.
After both sides of the quilt were completely assembled I ironed all the seams flat again. I used spray starch to make sure they stayed nice and flat.
I laid one side of the quilt face down on a large table and then laid a large piece of batting on top of it. I used an iron to press the batting completely flat and smooth.
I rolled back one side of the batting and used a spray adhesive (made especially for quilting and basting) to coat the top of the batting. Then I carefully rolled the batting back into place making sure to smooth it into place.
Then I rolled back the other side of the batting and repeated the adhesive spray.
I finally laid the top of the quilt into place on top of the batting. Starting at the center of the quilt I carefully lined up the squares and seams to the other side of the quilt and used safety pins to pin it in place.
I rolled back one side of the quilt top and sprayed enough adhesive to cover the area of one row of quilting squares. Then I carefully rolled one row of the squares back in place and used safety pins to secure just that row in place by matching up the seams (mostly where each section of 4 squares meet together).
I slowly repeated this process for every row in the quilt until I reach the edges. Then I repeated for the other side of the quilt. By the end, my entire quilt was pin together with all the seams matching from front to back. If any of the squares look a little wonky or tilted I used a little bit of tugging back and forth to smooth out the entire quilt.
I used embroidery thread to make little ties at each intersection of squares. This holds the entire quilt together and secures the pieces in place. On the entire quilt was secured I removed the safety pins.
I made a little template to round out the corners of the quilt:
Instead of binding the quilt, to keep with the exposed seams used in the dresses, I just used my serger to add color thread all the way around. You can add bias tape around the edges if you don’t have a serger.
Here’s Diesel enjoying the blanket this morning out in the yard!
I added a few extra appliques from t-shirts that weren’t able to be added as a square…..it made the quilt a little more interesting. A t-shirt quilt (or dress quilt!) is a great way to preserve memories so that they’ll be enjoyed every day!
Another addition to Boo’s playroom….a paper mache unicorn head! It took about 4 hours total to make….over 3 days. I love that it’s whimsical 3-dimensional artwork appropriate for a child’s room.
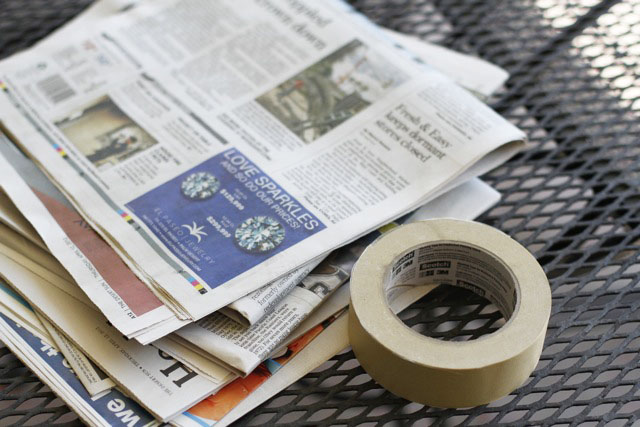
To make the animal head I started with newspaper and masking tape:

I crumpled up newspaper and kept wrapping it into a ball until it was the size needed and secured it with masking tape:
I made three different sized newspaper balls to make up the entire head…..
….and secured them together with tape.
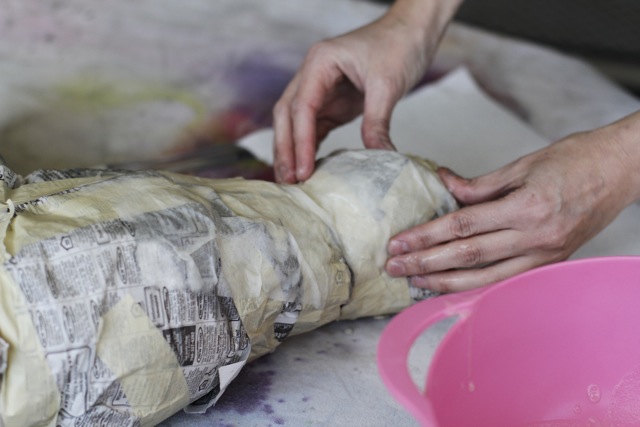
I wrapped the pieces in newspaper to help secure them and used tape to contour different sections:
I formed a neck out of newspaper and attached it:
I cut a heavy piece of cardboard to be the backing for the neck (the flat piece that will lie against the wall when mounted):
The cardboard was secured with masking tape:
I use a boiled paste for my paper mache mixture. 1 part flour to 4 parts water works for best for me but you can experiment with your own mixture to see what you prefer to work with. I bring it to a boil stirring constantly until it’s a soupy mixture.
Pouring the soupy paper mache into a bowl I let it cool for about a minute and then start tearing paper towels into small pieces. I use paper towels because they are easier to sculpt.
I dipped pieces of paper towel into the mixture…..
…..and then slowly covered the entire head.
I press and sculpt the head as I go to give it the shape I want:
Once the head has been coated completely I let it completely dry overnight:
The next day, I cut out some ears…..
…..and made a horn by wrapping a sturdy piece of paper into a cone. I used masking tape to secure them into place.
I made another mixture of paper mache and used paper towel pieces to secure the horn and ears securely to the head:
Paper towels are great for sculpting….so I used pieces to create nostrils and more bone structure. It doesn’t matter what it looks like except for the basic structure because I’m adding another layer of nicer paper on top for the finish coat.
I built up layers and layers until the head looked like I wanted it to.
Then I let it dry overnight again!
After the paper mache form had ample time to dry….I took an old book and some Mod Podge and used it to cover the entire form.
I cut up the pages into small piece and just started layering them over…….
….and over…..until the form was covered entirely.
I bought a pre-cut wood plaque from Michael’s for $5.00 using my 50% off coupon and spray painted it hot pink.
The final step was to attach the unicorn head to the plaque! I used industrial glue and a staple gun to secure it. The staples are easily covered with some more paper and Mod Podge.
I can’t decide what animal to make next!
Check out the entire Project Playroom series by clicking the image below!
