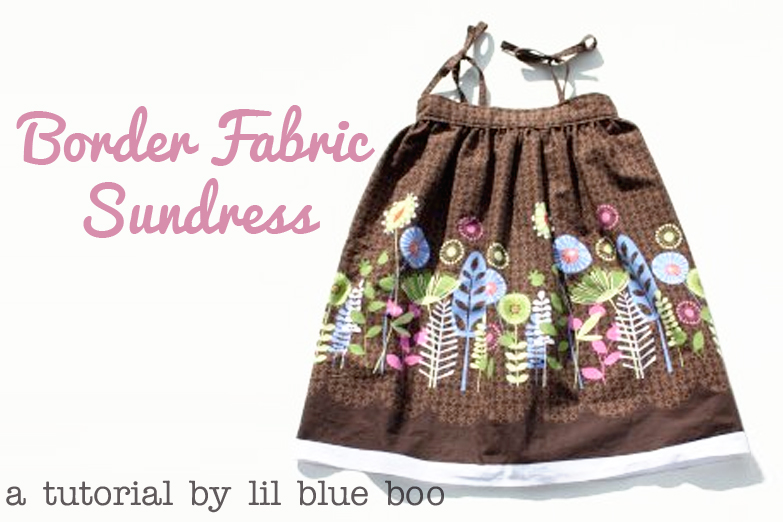
Fabrics with a border at the bottom or top can define a dress! The fabric I used for this little sun dress is Pod Posey Border from Michael Miller. I decided not to hem the dress and left the white selvage border at the bottom because I love the contrast it gives to the dress (and there was no writing on this selvage side). I’ve included the tutorial for the dress below. It is only a 30-45 minute project! Make sure to add your finished dress to the Lil Blue Boo Flickr Gallery!
Here is the fabric before cutting. Both sides have the border. I bought a ton of this fabric last summer because I was planning to make a bed skirt for my daughter’s crib with it. I had to find another use for it because she is no longer in a crib! I might even make a skirt for myself with it.
Step 1: Cut out your fabric pieces:
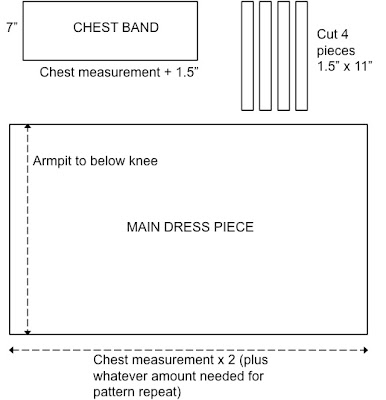
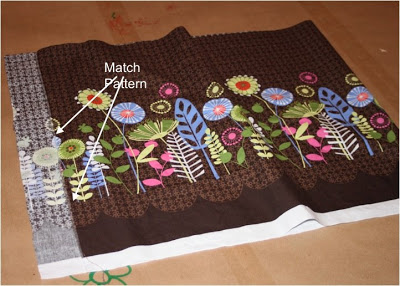
Cutting your main piece you may need to add extra width in order to match the pattern:
Using sections of the fabric without the border, cut the chest band piece and the strap pieces:
Note: If your fabric has NO stretch at all or you are sewing for a child under 12 months old, you might want to add another 1″ to your chest band measurement (i.e. 7″ x chest measurement plu 2.5″). This will give you some extra breathing room…especially for those roly poly bellies!
Step 2: For your main piece, match the pattern and sew up the side with 1/4″ seam and finish the edge.
Open the main piece up to the right side and iron your seam to make sure you have matched the pattern properly.
Step 3: Fold the chest band in half (right sides together) and sew the shorter sides together using a 1/4″ inseam. Then, press the seam open with iron.
Fold the chest band in half and iron the fold.
Open the chest band up and the fold both sides inward to the middle. Iron the folds.
Fold both sides closed and iron.
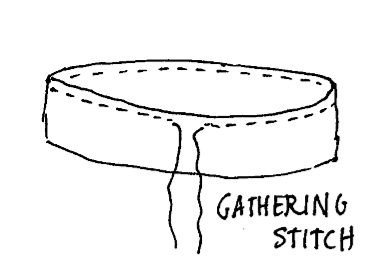
Sew all the way around the top of the main dress piece about 1/4″ from the edge using your longest stitch setting (about a 6 or 7). You will use this stitching to create the gathering in the ruffle. I like to overlap the beginning and end of this stitch line (but don’t sew over the other!) so there isn’t a gap in the gathering where the threads end. Be careful when pulling your thread through and work in small increments or you might break the thread! Gather the fabric until you get it to be the same width as your chest band. Tie off your thread.
Step 5: Mark the front middle, back middle and sides of the chest band with pins.
Match the pins of the chest band to the pins of the gathered main dress piece at the front, back and sides. Slip the main dress piece up into the chest band about 1/2″ and pin in place.
In between the pins, make sure that the gathered fabric is spaces evenly and add more pins around the dress to keep the gathering in place.
Step 7: Take your small 1.5″ x 11″ pieces and turn them into bias tape. Use the tutorial from my pillowcase dress post if you haven’t done this before!
Fold in the ends of the bias tape.
Sew the bias tape all the way around edges so that each piece of fabric becomes a dress strap.
Step 8: Pin 2 straps to the inside front and pin 2 straps to the inside back of the dress chest band so that they hang about 1/2″ down into the dress. The spacing from the middle will depend on your child’s size, but I pinned Sienna’s 2.75″ from the middle for the front and 2.25″ from the middle for the back.
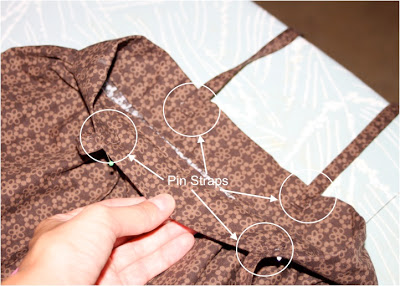
Sew 1/8″ down from the top of the dress to attach the 4 straps all the way around.
Just a note: you can use any fabric for this dress….I was just inspired by the “border” fabric. Two contrasting fabrics would work well for the chest band and an added border at the bottom of the dress!
Here is Sienna wearing her new dress! Feel free to email me if you have questions or get stuck on my tutorial! Click here to see the gallery of photos that other readers have sent me!

