I saw these white lace shorts on Honestly WTF and loved them so much but wanted to make more of an everyday pair. To make mine I took a pair of white jean shorts I bought for our beach trip ($19 from Target) and some plain white crochet lace trim:
Upcycling Broken China (A Tutorial)
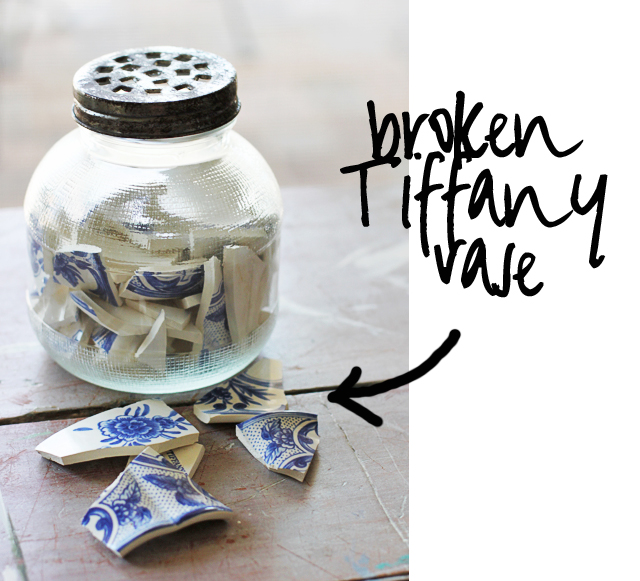
Ever break a glass or dish you love? Happens here all the time…..and I can never bring myself to throw the pieces away. I always have big plans to one day make a big mosaic wall or table…..but in the meantime I’ve decided to use the pieces for some smaller projects. This jar holds every single piece of porcelain from a Tiffany vase I broke a few years ago:
Apron Skirts (A Tutorial and Download)
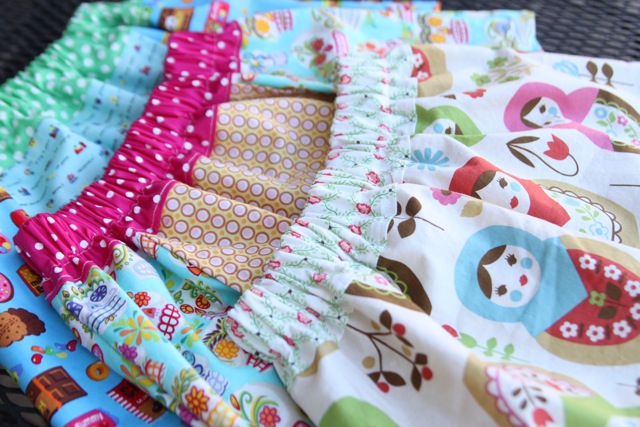
I’m attacking my fabric stash….and making apron skirts! I have so many novelty prints that look fun mismatched:
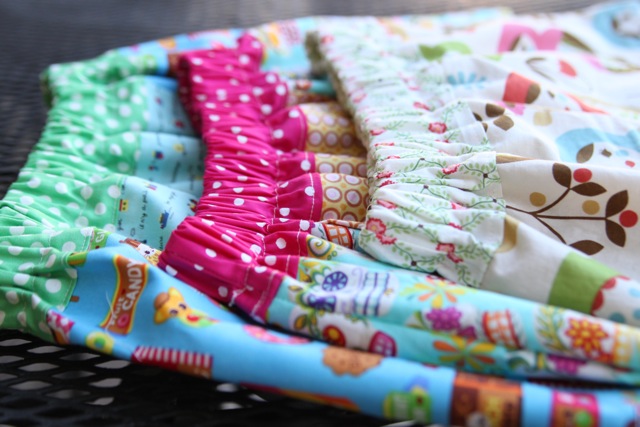
Here are just a few combinations I’ve made recently:
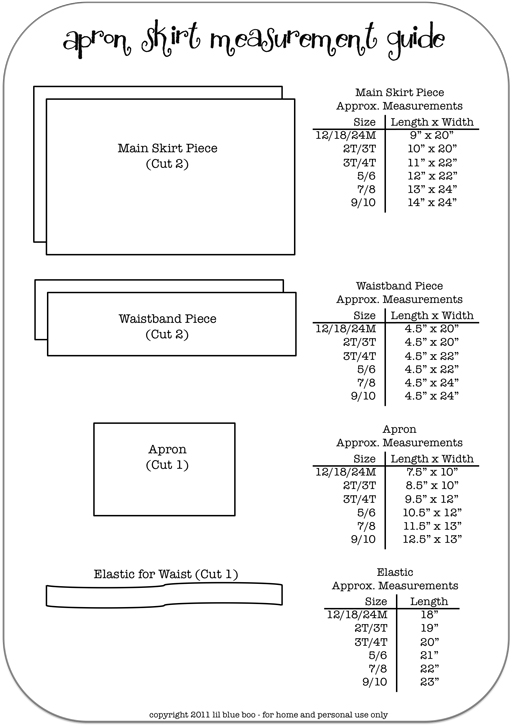
Here are the basic measurements I use for skirts (click image to download a PDF version):
To make your skirt the directions are pretty straight forward:
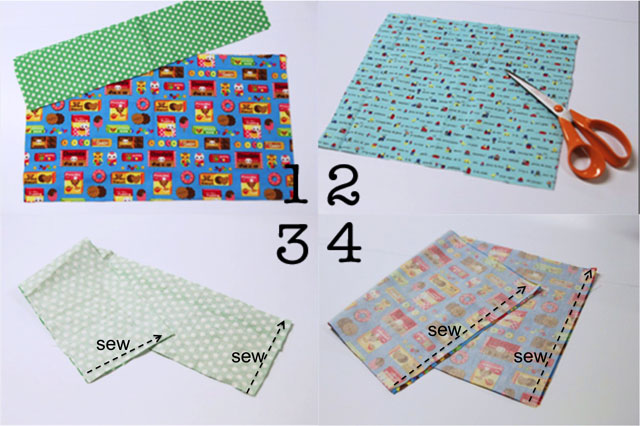
Step 1: Cut 2 main skirt pieces and 2 waistband pieces using the measurements in the chart.
Step 2: Cut one apron piece using the measurements in the chart.
Step 3: Place your two waistband pieces together so that the right sides are facing each other and sew up the sides as shown using a 1/4″ seam. Finish your edges with a zig zag stitch or an overlock machine.
Step 4: Place your two main skirt pieces together so that the right sides are facing each other and sew up the sides as shown using a 1/4″ seam. Finish your edges with a zig zag stitch or an overlock machine.
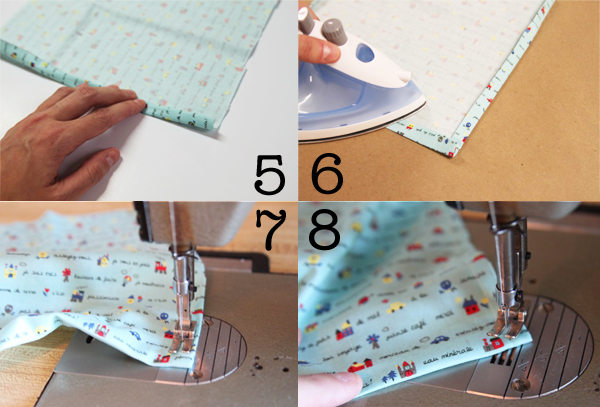
Step 5 & 6: Take your apron piece and fold one side 1/4″ and then again 1/2″. Press with an iron. Repeat for the opposite side and bottom of apron piece.
Step 7 & 8: Stitch the sides and bottom of the apron with a 3/8″ seam.
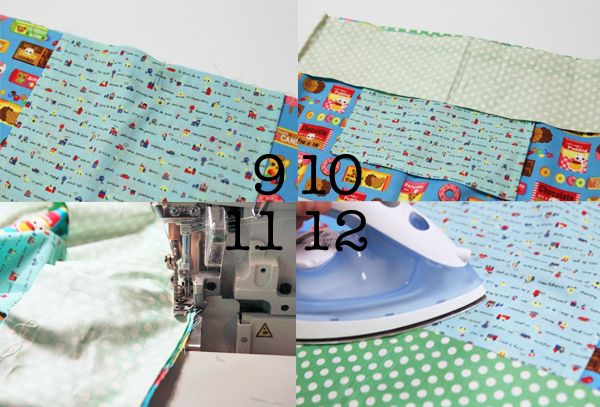
Step 9: Turn your main skirt piece right side out and place the apron piece on top so that it is centered in the middle.
Step 10: Place the main skirt piece up inside the waistband piece so that the right sides are together (your waistband piece will actually be upside down).
Step 11: Stitch all the way around the top of the waistband piece attaching all three pieces (main skirt piece, apron and waistband piece. Finish your edges with a zig zag stitch or an overlock machine.
Step 12: Flip the waistband piece back up and iron the seam flat (so that the inside of the seam is pointed upward onto the waistband).
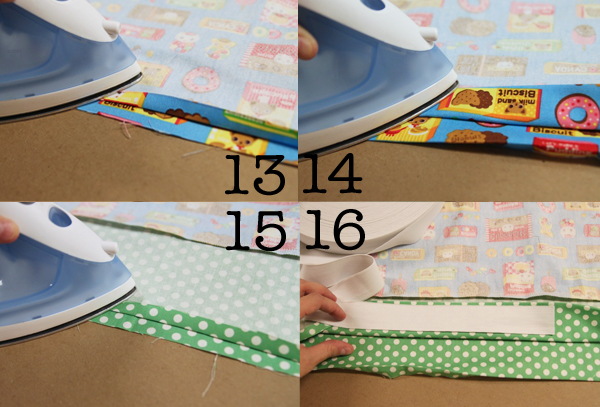
Step 13 & 14: Fold the hem of your skirt up a 1/2″ and press with an iron. Fold the hem over 1″ and press with an iron.
Step 15: Fold your waistband down 1/2″ and press with an iron.
Step 16: Fold your waistband down enough to accommodate the elastic width (allow about and 1/4″ on each side). Press with an iron.
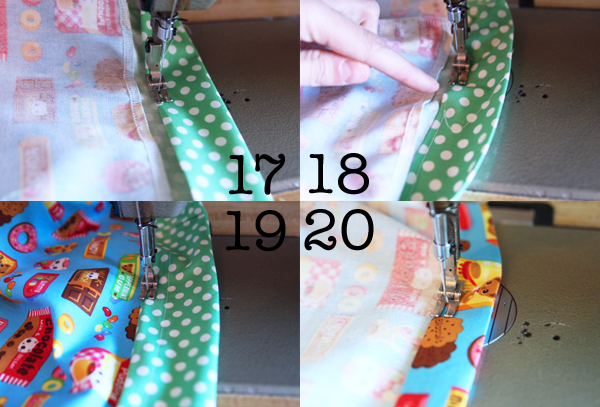
Step 17 & 18: Stitch the bottom fold of the waistband with a 1/8″ seam all the way around but leaving an inch opening to insert your elastic through.
Step 19: Top stitch the seam connecting the waistband and the main skirt piece.
Step 20: Stitch all the way around the hem of the skirt using a 1/8″ seam.
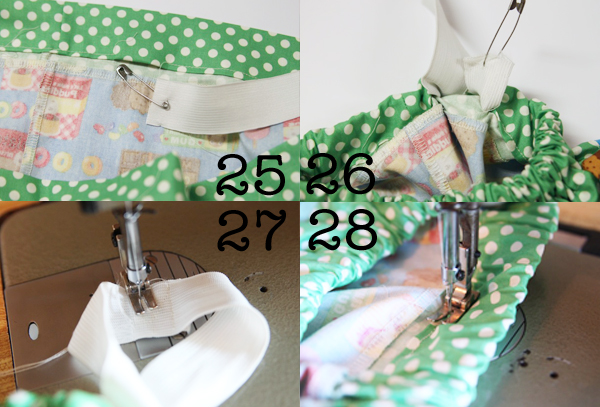
Step 25 & 26: Using a safety pin, insert the elastic up into the 1″ gap in the waistband and work it all the way around until it comes out the other side.
Step 27: Stitch the elastic closed.
Step 28: Stitch the 1″ gap closed.
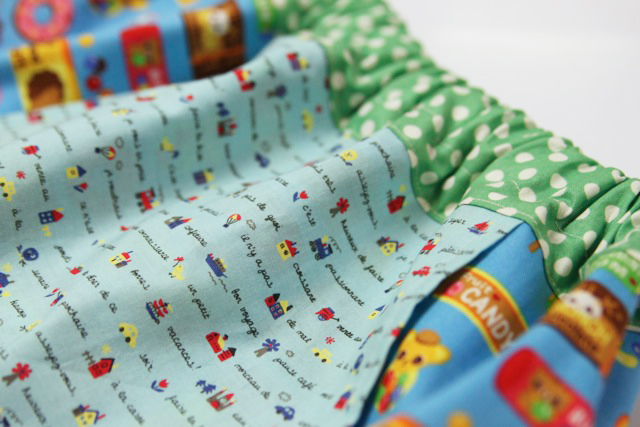
A finished apron skirt! You can also leave the apron off for an easy basic skirt.
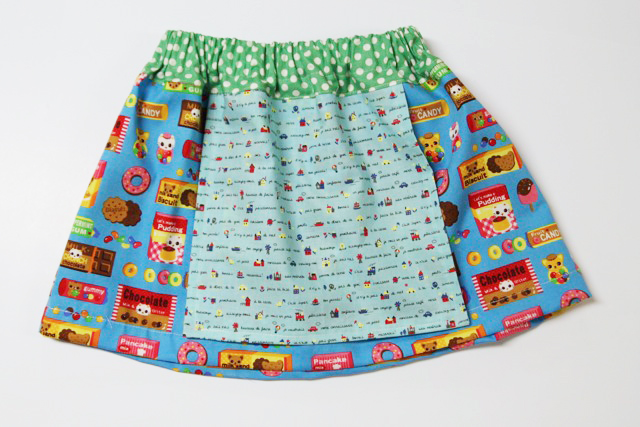
I love the contrast of these fun Japanese fabrics:
- « Previous Page
- 1
- …
- 70
- 71
- 72
- 73
- 74
- …
- 136
- Next Page »


