
I am so excited about this DIY summer camp trunk organizer. Boo recently went to her first overnight camp and she was a little nervous about it. When I told her that I used to take a trunk to camp, and that I made organizers for it, she jumped all over the idea. She started searching the Internet and found all these great products for summer camp trunks but they all were so expensive, so we decided to come up with our own DIY trunk organization from scratch. We spent the last few weeks focusing on her “packing” excitement and it took away almost all of her jitters. When we finished the trunk she had one word for it: epic.
First, I had to find a reasonably priced camp trunk to start with. I ended up buying a blue Mercury Seward 30″ Trunk because it was made in the USA, reasonably priced, and has wheels on it for rolling.(You can purchase it in other colors here as well.) I am really happy with the quality of the trunk…it’s just like the one I used to have when I was Boo’s age:

We’d been collecting outdoor stickers and Life Outside stickers for a while and as soon as the camp trunk arrived she quickly got to work decorating her trunk. A few of you even sent some awesome stickers in the mail! Thank you! She is so excited to keep adding stickers as she goes…she even bought a camp sticker the first day to add to her trunk:

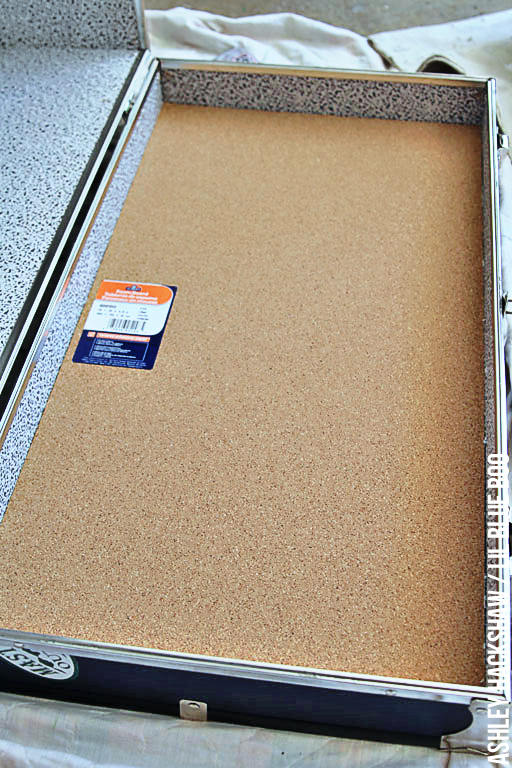
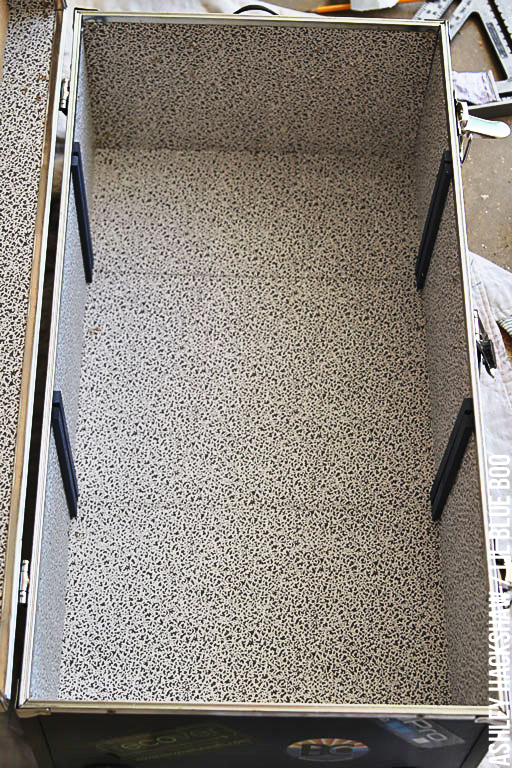
The inside of the trunk was a blank slate:

The first thing we did was make the lid a bulletin board/organizer. We took a piece of Elmer’s Cork Foam Board and used a utility knife to cut it to the same dimensions as the inside of the trunk lid:

I used E 6000 Adhesive Glue to keep it permanently in place. While it dried I place a few large books on top of the bulletin board just to make sure it didn’t warp:
To add lid organization I purchased a few different kinds of inexpensive pencil cases:
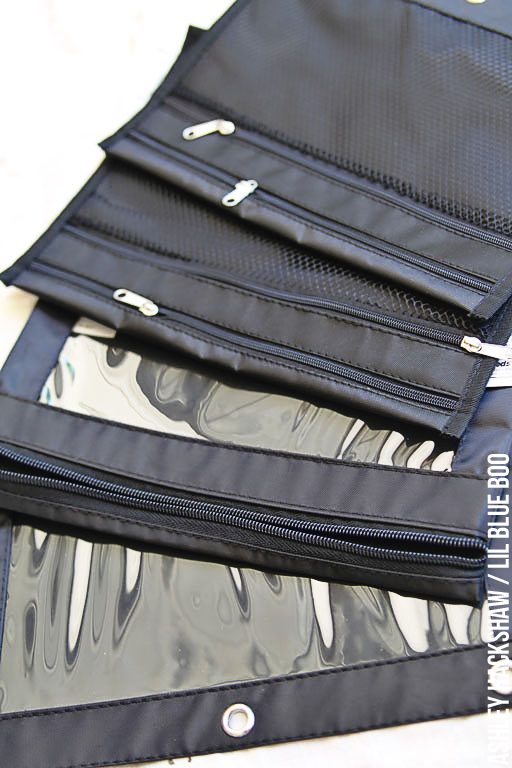
I only ended up using two of them because Boo wanted to use more of her bulletin board. We glued the pencil cases directly to the bulletin board as shown below:

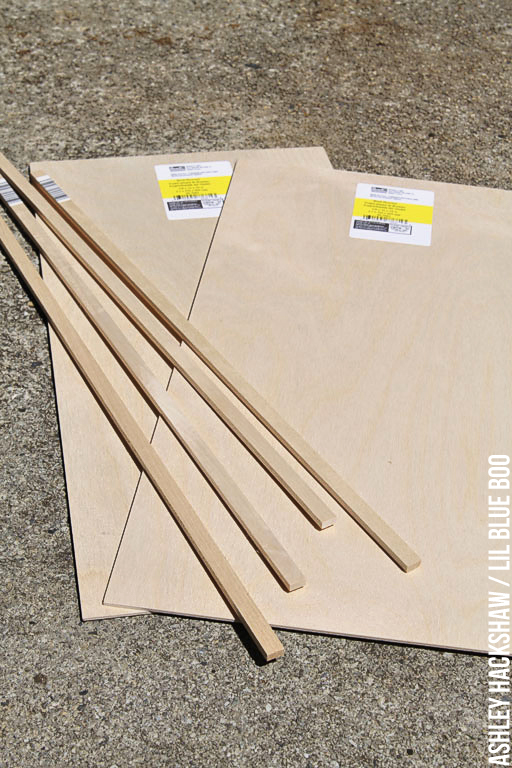
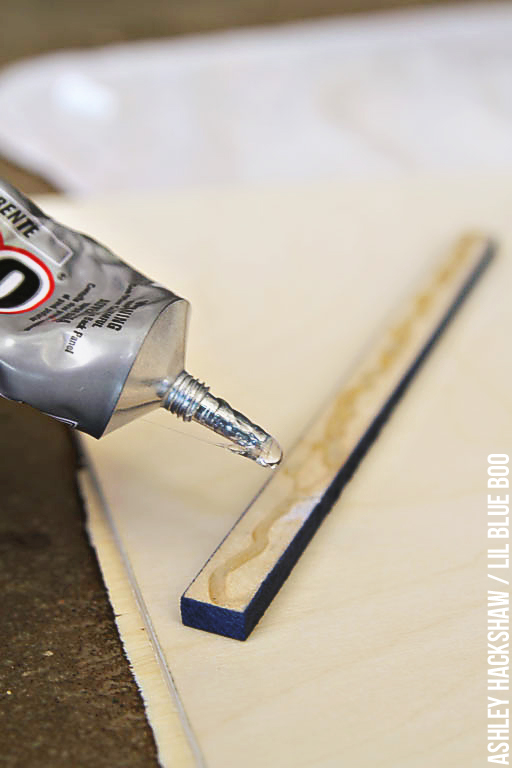
Next we made dividers for the trunk using two sheets of craft plywood measuring 1/8″ x 12″ x 24″ and four strips of Balsa Wood 1/4″ x 1/2″ x 24″. This wood can be found at Michaels in the model airplane/craft wood section:
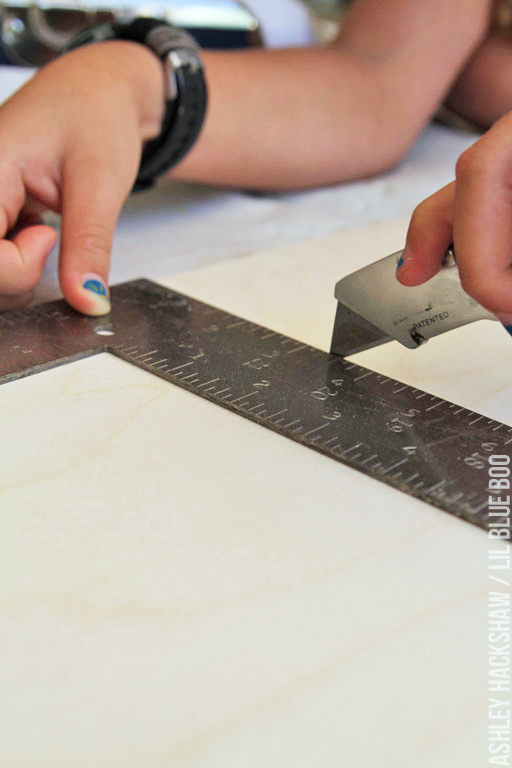
We cut the plywood into two pieces that fit the width and height of the open trunk. You don’t need any fancy saws to cut just a sharp utility knife. You may have to cut quite a few times though to get through each layer:
We also cut the basswood strips so that we had eight pieces that would fit the height of the open trunk, just under the lip. The wood was spray painted to coordinate with the trunk:

Once the wood was dry I used E 6000 to glue the strips carefully into place:
Here’s how they were glued, two on each side of the trunk for each divider to slide down into:

The finished basswood pieces:
Once the basswood pieces were dry I was able to slide the dividers down into them. Voila…removable trunk dividers:
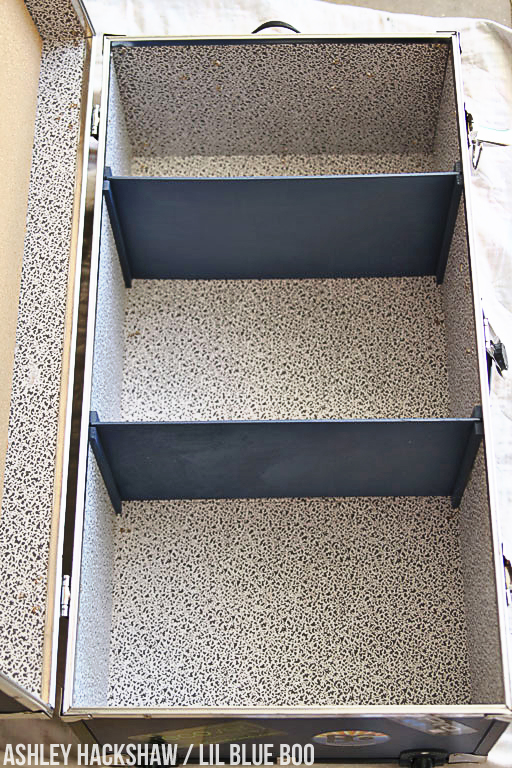
You’ll have to plan out your own dividers as far as placement. We placed ours so that they would fit Ziploc bags at one end, a tote on the other, and a bath caddy in the middle:

I found this great canvas tote for under $5.00 at Michaels Craft Stores…it’s used for carrying paint brushes and other art tools but it’s the perfect tote for odds and ends in the trunk:

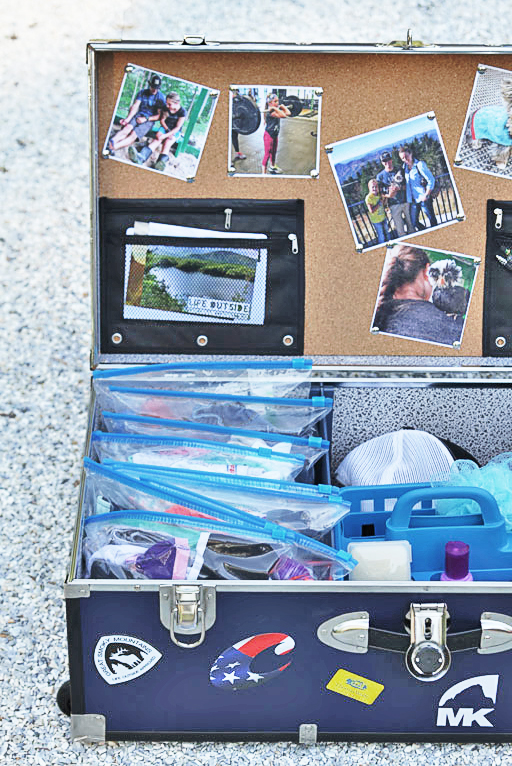
Everything packed and ready to go!

We packed each camp outfit in a plastic bag to keep them from getting that funky camp smell. Each ziploc bag holds a tank top, shorts, underwear, and socks:

This side of the lid holds pre-stamped postcards and notecards:

The other side holds odds and ends:

I printed off a few favorite photos for her to pin to the top of the lid. I covered them with layered packing tape before cutting them out to keep the ink from bleeding if they happened to get damp or wet:

The bath caddy I got from the Dollar Store and she can leave it out until the end of camp:

Everything else (sheets, towels, pillows) were packing into her huge (clean) laundry bag. I used puffy paint to put her name on it in huge letters. All the dirty laundry will come back in the same bag!

I read an article a few years ago that some parents stress out over camp so much that they pay people huge sums to pack their kids’ camp trunks. It doesn’t have to be hard or expensive. We had so much fun working on this project together. She directed the entire project and I just gave pitched in ideas on how to construct it all. Hope your kiddos have fun at camp this year!


